
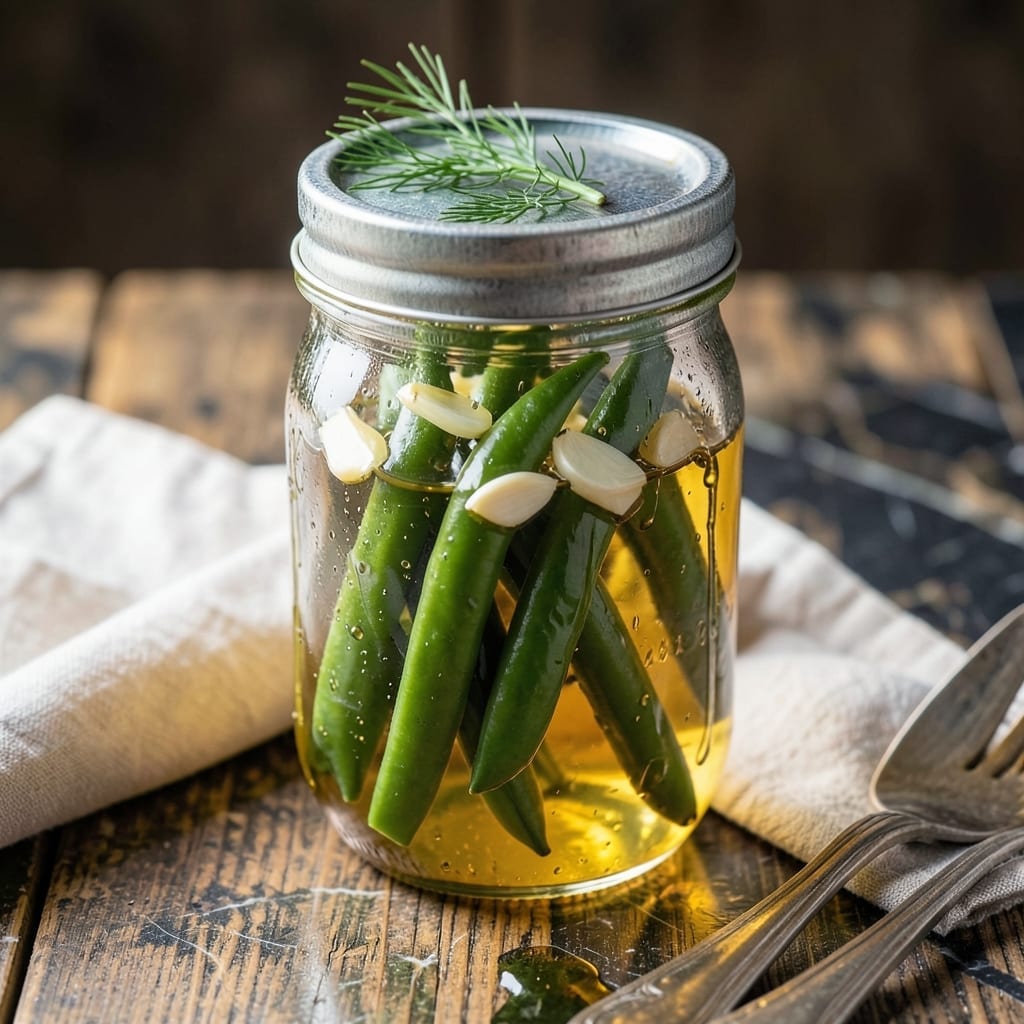
I discovered the magic of quick pickling during a busy weeknight when I needed to preserve a bounty of fresh green beans. This method delivers crisp, tangy results in just 30 minutes, transforming ordinary vegetables into something extraordinary.
The key is a simple brine of vinegar, water, salt, and sugar, poured hot over fresh beans. No special equipment is needed—just a jar and a little patience. The beans stay vibrant and crunchy, with a bright, tangy flavor that enhances any meal.
What you get is a side dish that’s ready faster than most salads, with the added bonus of extended shelf life. These pickled green beans add a refreshing crunch to charcuterie boards, sandwiches, or salads.
Perfect for meal prep or last-minute entertaining. Here’s how to make them.
Ingredients for Pickled Green Bean Recipe Quick
Fresh green beans and a simple brine transform into these crisp, tangy pickles in minutes.
| Ingredient | Amount | Notes |
|---|---|---|
| Fresh Green Beans 🫑 | 1 lb | Trimmed, ends removed |
| White Vinegar 🍶 | 1 ½ cups | Distilled or apple cider works too |
| Water 💧 | 1 ½ cups | Filtered for best flavor |
| Granulated Sugar 🍚 | 2 tbsp | Organic or raw cane preferred |
| Kosher Salt 🧂 | 1 ½ tbsp | Diamond Crystal brand ideal |
| Garlic Cloves 🧄 | 4 cloves | Peeled, lightly crushed |
| Black Peppercorns 🌶️ | 1 tsp | Whole, not ground |
| Mustard Seeds 🌿 | 1 tsp | Yellow or brown variety |
| Dill Seeds 🌿 | 1 tsp | Optional for extra flavor |
| Red Pepper Flakes 🔥 | ½ tsp | Adjust for heat preference |
| Fresh Dill Sprigs 🌿 | 2 whole | Optional garnish addition |
The beans are the star here—look for slender, firm pods without blemishes at your local farmers market or Whole Foods. They should snap when bent, not bend. The vinegar matters too: distilled white gives the cleanest flavor, but apple cider vinegar adds a nice depth (just expect a slightly different color). I always grab my kosher salt from the bulk section—Diamond Crystal is my go-to for consistent results every time.
No fresh dill? Dried dill weed at one-third the amount works fine. Short on mustard seeds? Coriander seeds bring a similar earthiness. If you’re out of peppercorns, a pinch of ground black pepper will do (though whole seeds add better texture). The sugar can be swapped for maple syrup or agave for a slight flavor variation. And if you can’t find slender green beans, regular ones work too—just cut them into spear lengths.
These keep beautifully in the fridge for up to 1 month—the flavor actually gets better after a day or two. Store in clean, airtight jars (mason jars are perfect). The beans will stay crisp if they’re fully submerged in brine. Don’t forget to label with the date so you remember when you made them.
Why You’ll Love This Recipe
- 20-Minute Magic: I toss the beans in boiling water for two minutes, then straight into the vinegar brine—done before the kids finish their snack.
- Tangy Crunch: That first bite of crisp green bean with the sharp vinegar kick and subtle sweetness? I make a double batch just to sneak extras from the jar.
- Meal Prep Hero: I pack these in little jars for lunches or set them out with charcuterie—my friends always ask for the recipe.
- Pantry Stable: Honestly, five ingredients I already have, and they keep for weeks in the fridge.
Step-by-Step Instructions for Pickled Green Beans
This method delivers crisp, tangy beans with minimal effort and maximum flavor.
Step 1: Prepare the Green Beans and Aromatics
Start by washing the 1 lb Fresh Green Beans thoroughly under cold water. Trim the ends and cut them to fit your jars if needed—I like to leave them whole for visual appeal. This step ensures your pickles have that satisfying crunch.
Peel the 4 cloves Garlic Cloves and lightly crush them with the side of your knife. This releases their aromatic oils without turning them to mush. Set them aside with the 1 tsp Black Peppercorns, 1 tsp Mustard Seeds, 1 tsp Dill Seeds, and 0.5 tsp Red Pepper Flakes.
Step 2: Create the Brine Solution
In a medium saucepan, combine the 1.5 cups White Vinegar, 1.5 cups Water, 2 tbsp Granulated Sugar, and 1.5 tbsp Kosher Salt. Stir well to dissolve the sugar and salt before placing the pan over medium-high heat.
Bring the mixture to a gentle boil, stirring occasionally. You’ll know it’s ready when the sugar and salt are fully dissolved and the liquid is clear and steaming. This usually takes 3-4 minutes. Remove from heat and let it cool slightly while you prepare the jars.
Step 3: Pack the Jars and Add Brine
Divide the trimmed green beans evenly between clean pint-sized jars, packing them tightly but leaving ½ inch of headspace at the top. Distribute the Garlic Cloves, Black Peppercorns, Mustard Seeds, Dill Seeds, Red Pepper Flakes, and 2 whole Fresh Dill Sprigs evenly among the jars.
Carefully pour the warm brine over the beans and aromatics, ensuring they’re fully submerged. Tap the jars gently on the counter to remove any air bubbles. If needed, add a bit more brine to maintain the ½ inch headspace.
Step 4: Cool and Store for Optimal Flavor
Let the jars cool to room temperature on the counter, which usually takes about 30-45 minutes. As they cool, you’ll see the beans begin to soften slightly and absorb the brine’s tangy flavor.
Once cool, seal the jars tightly and refrigerate. For the best crunch and flavor, wait at least 24 hours before eating. However, if you’re impatient, you can sample one after 4-6 hours—they’ll still be delicious, just a bit milder. These will keep in the fridge for up to 2 weeks.
Pro Tips For Making Pickled Green Bean Recipe Quick
- Trim Evenly: Cut the stem ends of the green beans so they’re uniform in length—about 4 inches. I learned this the hard way when half my beans were too long for the jars.
- Boil the Brine: Heat the vinegar, water, sugar, and salt until the sugar fully dissolves. Sounds tedious, but it works—no grainy texture at the bottom of your jar.
- Pack Tightly: Stuff the beans vertically into the jars as snugly as possible. Skip this and they’ll float, leaving sad, pale tips above the brine.
- Use Hot Brine: Pour the vinegar mixture over the beans while it’s still steaming. My grandmother swore by this, and she was right: it jumpstarts the pickling process.
Health Benefits of This Dish
Rich in Fiber
Green beans are packed with dietary fiber—about 4 grams per cup—which supports healthy digestion and helps maintain stable blood sugar levels. This makes them a great choice for anyone looking to add more plant-based nutrition to their diet. 💪
Low-Calorie Crunch
With only 44 calories per cup, these pickled beans are a guilt-free snack or side dish. The quick pickling process preserves their natural nutrients while adding minimal extra calories from the brine.
Vitamin Boost
You’ll get a healthy dose of vitamin C and vitamin K from green beans, which support immune function and bone health. The vinegar in the brine even helps preserve these nutrients during storage.
Antioxidant Properties
Green beans contain flavonoids and carotenoids, antioxidants that help combat oxidative stress. The garlic and dill in the recipe add extra antioxidant power, making this a nutrient-dense addition to any meal.
Probiotic Potential
While not a true fermented food, the vinegar in this recipe introduces beneficial acids that can support gut health. For a probiotic boost, I sometimes add a splash of apple cider vinegar with the mother. 🌟
Hydration Helper
These pickled beans are about 90% water, contributing to your daily hydration needs. The electrolyte balance from the salt and minerals in the brine makes them a refreshing, hydrating snack.
Nutrition Facts
Frequently Asked Questions
Can I use frozen green beans for quick pickling?
Fresh is best for crunch, but frozen works in a pinch. Thaw and drain well first to prevent watery pickles. The texture may be slightly softer than with fresh beans.
How long do quick pickled beans stay crisp?
They’ll keep their crunch for 1-2 weeks in the fridge. For best results, ensure beans are fully submerged in brine and use a clean utensil each time you serve.
What if my brine is cloudy after cooling?
Cloudiness is harmless and often comes from minerals in the water or spices. For clearer brine, use filtered water and strain before pouring. The flavor won’t be affected.
Can I reuse the pickling brine?
Yes, but only once. Reheat the brine to boiling, then pour over fresh vegetables. The flavor will be milder the second time, so add extra aromatics.

- Potato Candy Recipe 1933: Vintage Peanut Butter Roll Delight - October 30, 2026
- Potato Chip Cookie Recipe With Pecans: Buttery Crunch Meets Nutty Richness - October 30, 2026
- Potato Patty Recipe No Egg: Crispy Edges Without the Binder - October 30, 2026