
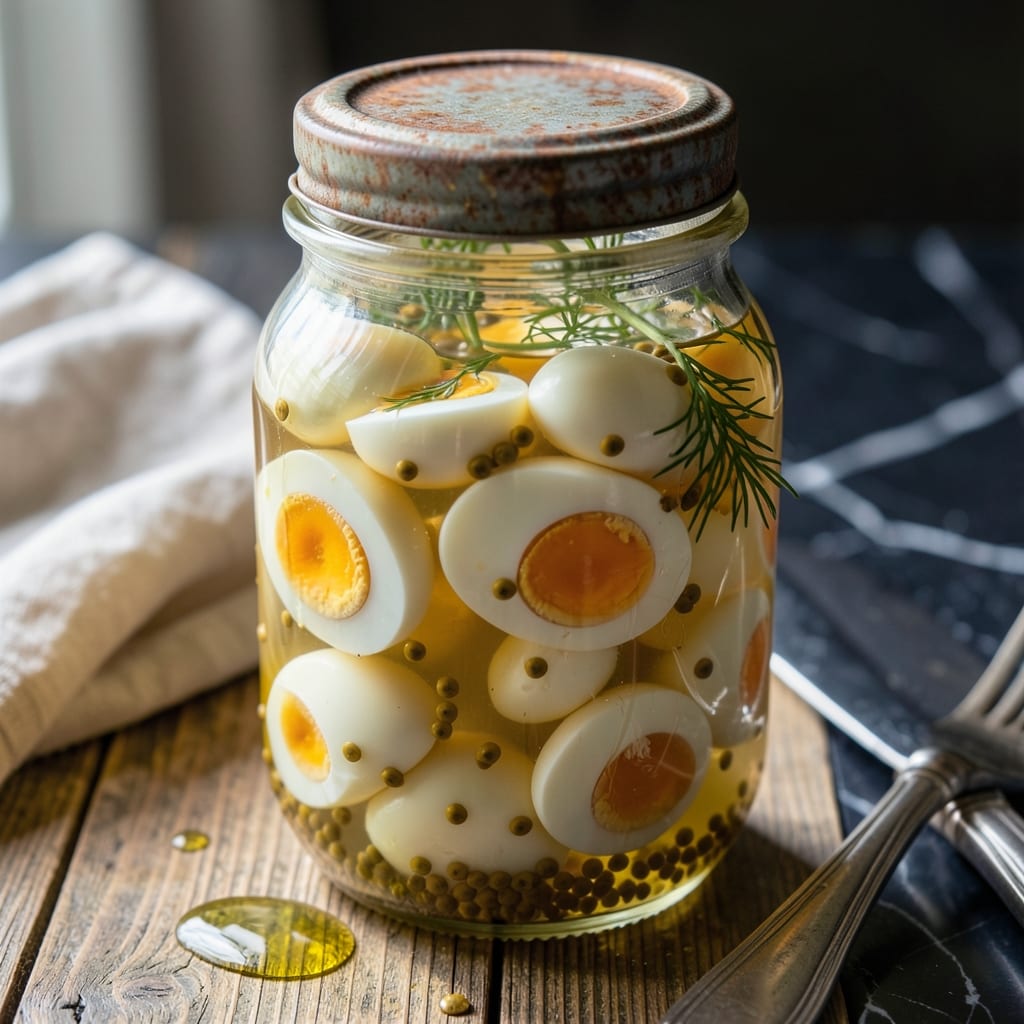
Preserving quail eggs in tangy brine creates a gourmet pantry staple that lasts for months. This method transforms delicate eggs into crisp, flavorful bites perfect for appetizers or salads.
The canning process ensures safety while maintaining texture and taste. A simple vinegar brine with spices infuses each egg with bright, balanced flavor.
You’ll achieve professional results with just 30 minutes of active prep. The eggs develop their signature tang after a 24-hour rest in the jars.
These pickled treats offer restaurant-quality taste with homemade satisfaction. The shelf-stable result means you can enjoy them anytime.
Ingredients for Pickled Quail Eggs Recipe for Canning
Delicate eggs meet bold spices for a pantry staple that lasts months.
| Ingredient | Amount | Notes |
|---|---|---|
| Quail Eggs 🥚 | 24 whole | Fresh, unpeeled, washed |
| White Vinegar 💧 | 2 cups | 5% acidity for preservation |
| Water 💧 | 1 cup | Filtered or distilled |
| Pickling Salt 🧂 | 1 tbsp | Non-iodized, fine grain |
| Granulated Sugar 🍚 | 1 tbsp | Balances acidity in brine |
| Yellow Mustard Seeds 🌿 | 1 tsp | Whole seeds for crunch |
| Black Peppercorns 🌶️ | 1 tsp | Whole, not ground |
| Dried Dill 🍃 | 1 tsp | Or 1 sprig fresh dill |
| Red Pepper Flakes 🔥 | ½ tsp | Adjust for heat preference |
| Bay Leaves 🌿 | 2 whole | Dried, whole leaves |
| Garlic Cloves 🧄 | 4 cloves | Peeled, smashed lightly |
| Small Red Onion 🧅 | ½ whole | Thinly sliced for brine |
Quail eggs are the star here. Look for fresh eggs at Asian markets or specialty grocers—they’ll keep longer than chicken eggs, so don’t stress about using them immediately. The vinegar needs to be 5% acidity (standard for pickling) to ensure safety. I always grab Ball or Kerr jars for canning—they’re reliable and widely available. For the spices, whole seeds and peppercorns give the best texture and flavor in the brine.
Swapping vinegar types works—apple cider or rice vinegar add different depth, but stick to 5% acidity. No mustard seeds? Coriander seeds at half the amount keep the crunch. Fresh dill is ideal (use a sprig per jar), but dried works too. Want more zing? Add a pinch of celery seeds. The sugar balances the acidity, but you can use honey (not for strict canning safety) or skip it if you prefer a sharper bite.
These eggs keep for 6-12 months unopened, 3 months once opened in the fridge. Always use clean, dry utensils when removing eggs from the jar. The brine is excellent for dressing salads or pickling other veggies (try radishes or green beans).
Why You’ll Love This Recipe
- Set and Forget: I toss quail eggs into the brine and walk away—no stirring, no fuss, just a jar on the counter doing its thing.
- Tangy Crunch: That first bite of vinegar-zipped egg with the pop of salt and sugar? Honestly, I sneak one every time I open the pantry.
- Party Starter: I pull out a jar of these tiny eggs for charcuterie boards, and they’re always the first to disappear.
- Pantry Hero: A batch lasts months, so I’ve got a fancy snack ready whenever the craving hits—or company drops by unexpectedly.
Step-by-Step Instructions for Pickled Quail Eggs for Canning
Here’s the method I rely on for perfectly preserved eggs with vibrant flavor and satisfying crunch.
Step 1: Hard-Boil and Peel the Quail Eggs
Place the 24 whole Quail Eggs in a saucepan and cover with cold water by 1 inch. Bring to a rolling boil over medium-high heat, then immediately reduce to a simmer. Cook for exactly 3 minutes—this shorter time prevents that unappetizing green ring around the yolk.
Drain the eggs and transfer them to an ice bath for 5 minutes to stop the cooking process completely. Gently tap each egg on a hard surface, then roll between your fingers to crack the shell all over. Peel under cool running water—the water helps separate the membrane from the egg, making peeling much easier.
Step 2: Prepare the Pickling Brine
In a medium saucepan, combine the 2 cups White Vinegar, 1 cup Water, 1 tbsp Pickling Salt, and 1 tbsp Granulated Sugar. Bring to a boil over medium-high heat, stirring until the salt and sugar fully dissolve. This ensures your brine is properly balanced for both flavor and preservation.
Once boiling, reduce the heat to low and add the 1 tsp Yellow Mustard Seeds, 1 tsp Black Peppercorns, 1 tsp Dried Dill, 0.5 tsp Red Pepper Flakes, 2 whole Bay Leaves, 4 cloves Garlic Cloves, and 0.5 whole Small Red Onion (thinly sliced). Let the mixture simmer for 5 minutes to allow the spices to infuse the liquid fully.
Step 3: Pack the Jars and Add Brine
Sterilize four 4-ounce canning jars and their lids by boiling them for 10 minutes. Pack the peeled quail eggs into the jars, leaving ½ inch of headspace at the top. Distribute the Small Red Onion slices, Garlic Cloves, and whole spices evenly among the jars for consistent flavor in each.
Ladle the hot brine over the eggs, ensuring they are completely submerged. Use a bubble remover or a clean knife to gently release any trapped air bubbles. Wipe the rims of the jars with a clean, damp cloth to ensure a proper seal.
Step 4: Process for Shelf Stability
Place the jars in a water bath canner, ensuring they are covered by at least 1 inch of water. Bring the water to a rolling boil and process the jars for 10 minutes. This step is crucial for shelf stability and safety.
Carefully remove the jars and place them on a towel-lined countertop to cool. You should hear the satisfying “pop” of the lids sealing as they cool. Let the jars sit undisturbed for 12 hours to allow the flavors to develop and the seal to set completely before testing.
Pro Tips For Making Pickled Quail Eggs Recipe For Canning
- Prick the Eggs: After hard-boiling, gently prick each quail egg with a needle or pin to let the brine penetrate fully—I learned this the hard way when my first batch stayed bland in the center.
- Boil Vinegar First: Heat your vinegar-water mix just until simmering before pouring over the eggs; it helps dissolve the salt and sugar faster and kills any surface bacteria for safer canning.
- Skip Old Eggs: Use the freshest quail eggs you can find—older ones are harder to peel cleanly, and bits of shell left on will ruin the texture of your pickled eggs.
- Use Pickling Salt: Regular table salt can turn your brine cloudy with anti-caking agents, so stick with pickling salt for crystal-clear liquid and better flavor in every jar.
Flavor Customization for This pickled quail eggs recipe for canning
Sweet and Tangy
For a fruit-forward twist, add ½ cup apple cider vinegar to the brine and include 1 tbsp brown sugar instead of granulated. The apple notes complement the eggs beautifully. I love this version in fall salads. 🍏
Spicy Heat Boost
Double the red pepper flakes to 1 tsp and add 2 sliced jalapeños per jar for serious heat. This creates a bold, Mexican-inspired flavor that’s perfect for tacos. The brine gets spicier over time.
Herb Infusion
Swap the dill for 1 tsp dried tarragon or 1 sprig fresh rosemary per jar. Tarragon adds a subtle anise note, while rosemary brings piney depth. Both pair wonderfully with charcuterie boards.
Asian-Inspired
Replace mustard seeds with 1 tsp coriander seeds and add 1 star anise pod plus 3 slices fresh ginger to the brine. This creates a complex, aromatic profile ideal for ramen toppings.
Garlic Lover’s
Increase garlic to 8 cloves and add 1 tsp garlic powder to the brine. The double garlic approach creates an intense, savory flavor that’s amazing in Bloody Marys. 🧄
Mild and Sweet
Reduce vinegar to 1½ cups and increase sugar to 2 tbsp for a milder, sweeter pickle. This version is perfect for kids or anyone who prefers less acidity. The eggs stay crisp with this adjustment.
Nutrition Facts
Frequently Asked Questions
How long must they sit before eating?
Wait at least 24 hours for the flavors to develop. The eggs taste best after 3-5 days in the brine.
What if my jars didn’t seal?
Refrigerate unsealed jars and use within 1 month. For shelf stability, reprocess with new lids or check your canner’s water level.
Can I reuse the pickling brine?
Yes, but only once. Bring it to a boil and use within 24 hours for fresh vegetables. Discard after second use.
Why are my eggs turning greenish?
This happens when overcooked or stored too long. Stick to 3 minutes boiling time and eat within 6 months for best color.

- Pina Colada Dip Recipe Red Lobster: Tropical Creaminess With Toasted Coconut - October 12, 2026
- Pickled Sweet Cherry Peppers Recipe Canning: Tangy Heat for Pantry Staples - October 12, 2026
- Peppercorn Sauce Recipe Vegan: Rich Umami Depth Without Cream - October 12, 2026