
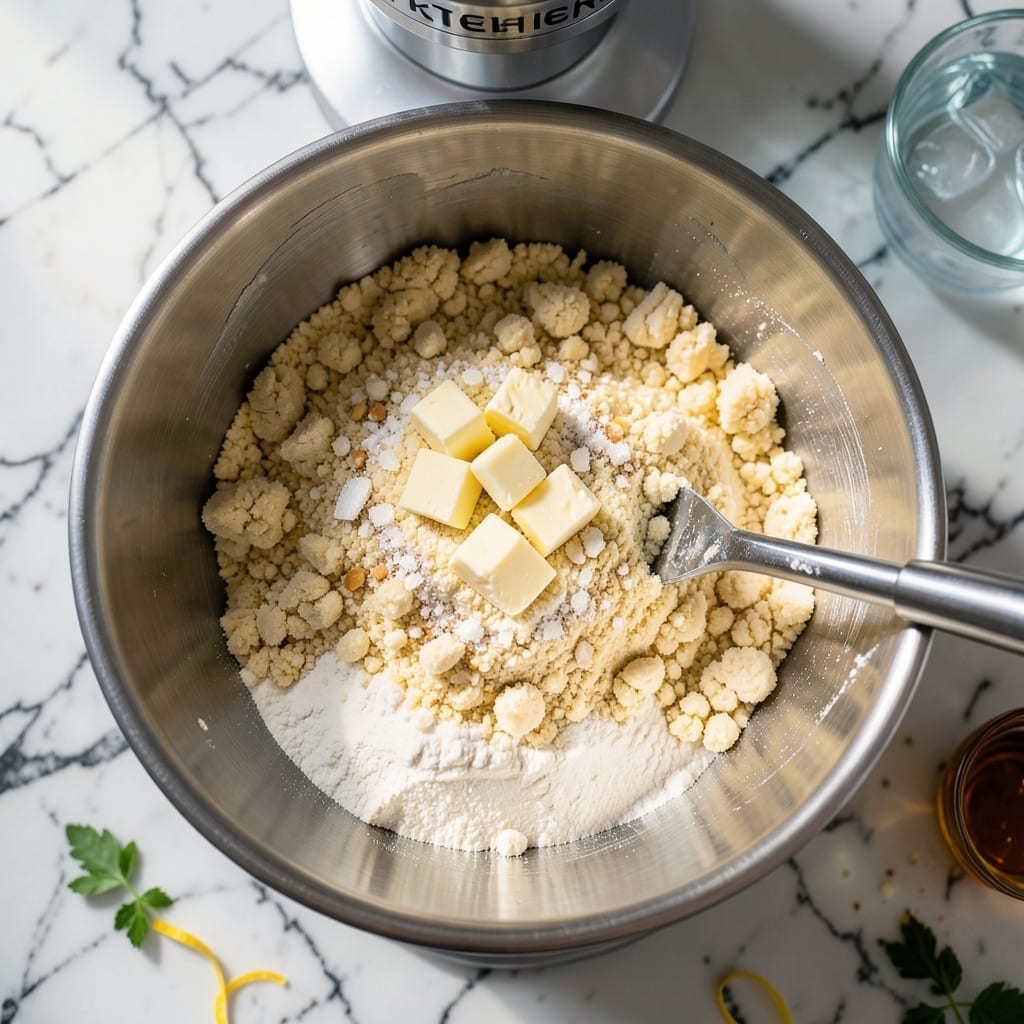
Achieving flaky pie crust at home is simpler than you think with a KitchenAid mixer handling the heavy work. The stand mixer ensures even distribution of cold butter throughout the flour, creating those perfect layers we all love.
This method eliminates the guesswork of hand-cutting butter while maintaining the essential cold temperature for success. The dough comes together in minutes with minimal effort, yet delivers professional-quality results every time.
What you get is a golden, flaky crust that holds its shape while baking and provides the perfect foundation for any pie filling. The mixer’s consistent action means no overworking the dough, which is the secret to tender layers.
Ready in under 20 minutes of active prep, with resting time built in for optimal texture. Here’s how to make it right.
Ingredients for Pie Crust Recipe Using Kitchenaid Mixer
Cold butter, flour, and a stand mixer are all you need for perfect layers.
| Ingredient | Amount | Notes |
|---|---|---|
| All-Purpose Flour 🌾 | 2 ½ cups | Spoon and level, plus extra for dusting |
| Unsalted Butter 🧈 | 1 cup | Very cold, cut into cubes |
| Granulated Sugar 🍚 | 1 tbsp | Fine white sugar preferred |
| Salt 🧂 | 1 tsp | Fine sea salt or table salt |
| Ice Water 💧 | ¼ cup | Plus extra as needed |
| Apple Cider Vinegar 🍏 | 1 tbsp | White vinegar works too |
| Vanilla Extract 🌿 | ½ tsp | Pure extract, not imitation |
The butter needs to stay cold—cut it into 1/2-inch cubes and freeze while prepping the dry ingredients. King Arthur Flour is my go-to for all-purpose, but any unbleached variety works. If you’re making a sweet crust, swap the sugar for powdered (1:1 ratio). The vinegar tenderizes the gluten—don’t skip it, even if you can’t taste it in the final crust.
No stand mixer? A food processor works too (pulse, don’t blend). For a richer crust, replace 1/4 cup flour with cornmeal. Out of apple cider vinegar? Lemon juice at the same amount does the trick. The dough should look shaggy, not smooth—overmixing = tough crust. And yes, European-style butter (higher fat) makes it even flakier.
The dough needs 30-60 minutes in the fridge before rolling. Wrap it tightly in plastic to prevent drying. Baked crusts keep 2 days at room temp, or freeze the dough (unbaked) for up to 3 months. Always let it warm slightly before rolling—cold dough cracks.
Why You’ll Love This Recipe
- Hands-Off Mixing: The KitchenAid does all the work—just toss in cold butter, flour, and a pinch of sugar, then let the paddle attachment handle the heavy lifting.
- Buttery Perfection: That flaky, golden crust comes from chilled unsalted butter and ice water, creating layers so tender they practically melt in your mouth.
- Endless Possibilities: Sweet or savory, this crust works for fruit pies, quiches, or even hand pies. I’ve used it for everything from apple to pot pie.
- Budget-Friendly Staple: All-purpose flour and basic pantry staples mean I can whip this up anytime without aspecial trip to the store. Honestly, it’s cheaper than store-bought.
Step-by-Step Instructions for Pie Crust Using KitchenAid Mixer
Here’s the method that guarantees flaky layers every time with minimal effort.
Step 1: Combine Dry Ingredients in Mixer Bowl
Attach the paddle attachment to your KitchenAid mixer. Add the 2.5 cups All-Purpose Flour, 1 tbsp Granulated Sugar, and 1 tsp Salt to the mixer bowl. Pulse on the lowest speed for 10-15 seconds until the dry ingredients are thoroughly combined.
This brief mixing ensures the salt and sugar are evenly distributed throughout the flour, which promotes consistent flavor and texture in every bite of your crust. The paddle attachment works better than the whisk here because it prevents flour from flying out of the bowl.
Step 2: Cut in Cold Butter Until Pea-Sized
Add the 1 cup Unsalted Butter (very cold, cut into cubes) to the flour mixture. Mix on low speed for 1-2 minutes until the butter is broken down into pea-sized crumbs. Watch closely—you want visible butter pieces, not a uniform sandy texture.
Stop the mixer and inspect the mixture. The butter should be coated in flour with some pieces as large as peas. This creates the layers that will separate during baking, giving you that coveted flaky texture. If the butter starts to soften or smear, chill the bowl in the refrigerator for 10 minutes before proceeding.
Step 3: Add Wet Ingredients Gradually
In a small bowl, whisk together the 0.25 cup Ice Water, 1 tbsp Apple Cider Vinegar, and 0.5 tsp Vanilla Extract. With the mixer running on low, slowly pour in the liquid mixture, 1 tablespoon at a time, until the dough just begins to come together.
You might not need all the liquid—stop adding as soon as the dough starts to clump. The vinegar tenderizes the gluten slightly, while the vanilla adds a subtle depth of flavor. The dough should look shaggy but hold together when pressed; it will come together fully during chilling.
Step 4: Form and Chill the Dough
Turn the dough out onto a lightly floured surface. Gently shape it into a disk about 1 inch thick without overworking it. Wrap the disk tightly in plastic wrap and refrigerate for at least 1 hour, or up to 2 days.
Chilling is non-negotiable. It allows the gluten to relax, making the dough easier to roll out, and solidifies the butter, which prevents it from melting too soon in the oven. This step ensures those distinct flaky layers form as the butter creates steam during baking.
Step 5: Roll Out and Shape for Baking
On a well-floured surface, roll out the chilled dough to ⅛-inch thickness, rotating the disk 45 degrees after every few rolls to maintain an even shape. Use a dry pastry brush to sweep off excess flour from the surface before transferring to your pie dish.
Press the dough gently into the pie plate without stretching it. Crimp the edges as desired, then chill the crust for another 30 minutes before blind baking or filling. This final rest prevents shrinking and ensures your crust maintains its shape during baking.
Pro Tips For Making Pie Crust Recipe Using Kitchenaid Mixer
- Chill the Butter: Cut the unsalted butter into small cubes and refrigerate for 20 minutes before mixing—I learned this the hard way after ending up with a tough crust from melted butter.
- Pulse, Don’t Overmix: Use the paddle attachment on low speed and stop as soon as the dough comes together; overworking it develops gluten, making the crust chewy instead of flaky.
- Use Ice-Cold Water: Measure your ice water separately and add it 1 tablespoon at a time—this keeps the butter from melting and guarantees a tender, layered texture.
- Rest Before Rolling: Wrap the dough and refrigerate for at least 30 minutes; skipping this step makes it shrink when baked, and I’ve ruined more than one pie by rushing it.
Serving Suggestions for pie crust recipe using kitchenaid mixer
Classic Pie Presentation
For fruit pies, brush the crust with 1 beaten egg white and sprinkle with 1 tbsp turbinado sugar for a glossy, golden finish. This creates that bakery-style sheen that makes any pie look professional. I always keep turbinado sugar on hand just for this purpose. 💫
Savory Pie Ideas
This crust works beautifully for quiches and pot pies too. For a savory twist, brush with olive oil and sprinkle with flaky sea salt before baking. The vanilla extract adds subtle depth that complements both sweet and savory fillings.
Pre-Baking for Custard Pies
For cream or custard pies, blind bake the crust at 375°F for 15-18 minutes until lightly golden. Use pie weights or dried beans to prevent puffing. I line my crust with parchment paper first to make weight removal easier.
Decorative Edges
Before baking, create decorative edges with a fork or your fingers for a homemade look. For lattice tops, cut 1-inch strips and weave them over fruit fillings. The KitchenAid mixer makes enough dough for both top and bottom crusts.
Serving Temperature
Let your pie cool for at least 2 hours before slicing to allow the filling to set. Serve fruit pies at room temperature, but custard pies taste best slightly warm. I always have vanilla ice cream ready for à la mode servings. ❄️
Storage Tips
Store cooled pies at room temperature for up to 2 days, or refrigerate for up to 5 days. For longer storage, freeze unbaked crusts wrapped tightly in plastic for up to 3 months. Thaw in the refrigerator overnight before using.
Nutrition Facts
Frequently Asked Questions
What attachment should I use?
Use the paddle attachment for best results. It evenly distributes butter while preventing flour from flying out.
How cold should the butter be?
Butter must be very cold, cut into 1/2-inch cubes, and kept refrigerated until use. This ensures flaky layers.
Can I make the dough ahead?
Yes! Wrap tightly and refrigerate for up to 2 days or freeze for 3 months. Thaw overnight before rolling.
Why is my crust tough?
Overmixing or warm butter causes toughness. Stop adding liquid once dough clumps and keep butter cold.

- Potato Candy Recipe 1933: Vintage Peanut Butter Roll Delight - October 30, 2026
- Potato Chip Cookie Recipe With Pecans: Buttery Crunch Meets Nutty Richness - October 30, 2026
- Potato Patty Recipe No Egg: Crispy Edges Without the Binder - October 30, 2026