
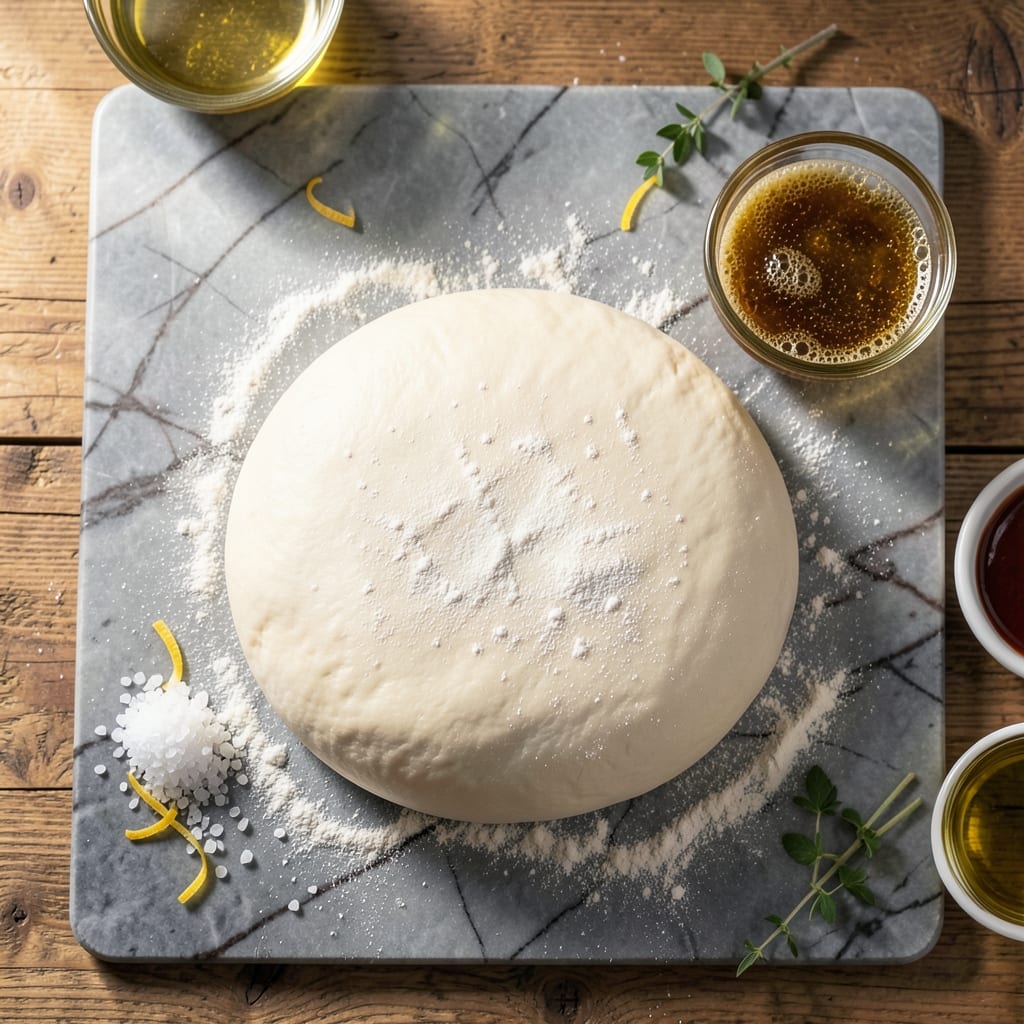
This pizza dough delivers the chewy texture and wood-fired flavor that most home recipes miss. I developed this through years of testing in different kitchens, always chasing that perfect crust.
The secret is a long, slow fermentation in the refrigerator, which builds complex flavors and creates those air pockets you expect from great pizza. David and I have tested this on everything from high-end ovens to basic home setups.
What you’ll get is a dough that bakes up crispy on the outside, airy and chewy inside, with those coveted leopard-spotted bubbles. It’s the foundation for any pizza style you want to create.
Make a batch today and you’ll never go back to store-bought dough. The process is simple but the results are professional.
Ingredients for Pizza Dough Recipe Pizza Dough
Eight ingredients stand between you and perfect wood-fired style pizza dough at home.
| Ingredient | Amount | Notes |
|---|---|---|
| Bread Flour 🌾 | 3 ½ cups | High protein for chewy texture |
| Active Dry Yeast 🍞 | 1 tsp | Instant yeast works too |
| Granulated Sugar 🧂 | 1 tsp | Feeds the yeast activation |
| Kosher Salt 🧂 | 1 ½ tsp | Diamond Crystal preferred |
| Warm Water 💧 | 1 ½ cups | 105-110°F for yeast |
| Extra-Virgin Olive Oil 🫒 | 2 tbsp | For dough elasticity |
| Semolina Flour 🌾 | ¼ cup | For dusting work surface |
| Cornmeal 🌽 | 2 tbsp | Prevents sticking on peel |
The flour is everything here. King Arthur Bread Flour is my go-to for that perfect chew—higher protein than all-purpose, which builds the gluten structure you need. Yeast from Fleischmann’s or Red Star works reliably, but check the expiration date (old yeast = sad dough). I always keep a bag of Bob’s Red Mill semolina on hand for dusting—gives that authentic pizzeria feel.
No bread flour? All-purpose plus 1 tbsp vital wheat gluten per cup gets you close. Out of yeast? Sourdough starter at twice the amount works in a pinch (just extend the rise time). Sugar can be swapped for honey at one-to-one ratio. For the olive oil, any neutral oil works, but that fruity EVOO adds depth. The cornmeal is optional but really helps with the transfer to the oven.
Dough keeps in the fridge for 3-4 days (actually improves with time) or freezes beautifully for up to 3 months. Portion into balls before freezing for easy weeknight pizzas. Bring to room temp before shaping—cold dough fights back.
Why You’ll Love This Recipe
- No-Fuss Mixing: Honestly, it’s just flour, yeast, sugar, salt, and warm water—no special tools, no fuss, and I can have the dough rising while I prep the toppings.
- Chewy Perfection: That bread flour gives it the ideal chew, and the sugar helps the crust brown just right—crisp on the outside, soft inside.
- Endless Toppings: I’ve used this dough for classic margherita, loaded veggie, even dessert pizzas with cinnamon sugar. It never lets me down.
- Budget Friendly: Five basic ingredients I always have on hand, and it makes two large pies for the cost of one takeout pizza.
Step-by-Step Instructions for Pizza Dough
Here’s how I make perfect pizza dough with a chewy crust and wood-fired flavor at home.
Step 1: Activate the Yeast
In a small bowl, combine the 1.5 cups warm water, 1 tsp granulated sugar, and 1 tsp active dry yeast. Stir gently and let it sit for 5-10 minutes until the mixture becomes foamy and cloudy. This proofing step confirms your yeast is alive and active.
I always check that the water temperature is between 105-110°F—too hot will kill the yeast, while too cold will prevent activation. The sugar gives the yeast something to feed on, creating those important bubbles that will make your crust light and airy.
Step 2: Mix and Knead the Dough
In a large mixing bowl, combine the 3.5 cups bread flour and 1.5 tsp kosher salt. Make a well in the center and pour in the yeast mixture along with the 2 tbsp extra-virgin olive oil. Using a wooden spoon, stir until a shaggy dough forms.
Turn the dough out onto a surface dusted with 0.25 cup semolina flour and knead for 8-10 minutes until smooth and elastic. The semolina prevents sticking while adding a subtle texture to your dough. You’ll know it’s ready when it springs back when poked gently with your finger.
Step 3: First Rise for Flavor Development
Place the dough in a lightly oiled bowl, turning once to coat all sides. Cover with a damp kitchen towel and let it rise in a warm, draft-free place for 1-2 hours or until doubled in size. I like to turn my oven on to its lowest setting for 2 minutes, then turn it off and place the bowl inside.
This first rise allows the yeast to ferment the sugars in the flour, developing that characteristic pizza dough flavor. Don’t rush this step—longer fermentation means better flavor. The dough should look puffy and have small bubbles on the surface when it’s ready.
Step 4: Shape and Second Rise
Punch down the risen dough to release the air, then divide it into 4 equal portions for individual pizzas. Shape each portion into a ball and place them on a surface dusted with 2 tbsp cornmeal to prevent sticking.
Cover the dough balls with the damp towel again and let them rest for 30-45 minutes. This second rise makes the dough easier to stretch and shape. The cornmeal not only prevents sticking but also adds a nice crunch to the finished crust, mimicking that wood-fired pizza parlor texture.
Step 5: Shape and Prepare for Baking
After the second rise, take one dough ball and gently press it into a flat disc with your fingers. Then, using your palms, stretch it from the center outward, rotating as you go, until you reach your desired thickness. For a classic Neapolitan-style crust, aim for about 10-12 inches in diameter.
Transfer the shaped dough to a pizza peel or baking sheet dusted with more cornmeal. This final preparation ensures your pizza won’t stick when you transfer it to the hot oven or pizza stone. The dough is now ready for your favorite toppings and baking.
Pro Tips For Making Pizza Dough Recipe Pizza Dough
- Test Your Yeast: I learned this the hard way—always proof your active dry yeast in the warm water with sugar first. If it doesn’t foam within 5-10 minutes, your dough won’t rise, and you’ll waste flour.
- Use Bread Flour: Skip all-purpose flour here; bread flour’s higher protein content gives that chewy, elastic texture you want in pizza dough.
- Don’t Rush Rising: After burning three batches, I finally figured out that letting the dough double in size—usually 1-2 hours in a warm spot—is non-negotiable for good flavor and texture.
- Warm the Bowl: Sounds weird, but it works: rinse your mixing bowl with warm water before adding ingredients. It keeps the dough warm and helps the yeast activate faster.
Troubleshooting Great pizza dough recipe pizza dough
Dough Didn’t Rise
First check your yeast expiration date—old yeast loses potency. If that’s fine, your water might have been too hot (over 115°F) or too cold (below 105°F). I keep a thermometer handy to test water temp. David once killed yeast with 130°F water—lesson learned. 🌡️
Dense or Tough Crust
Over-kneading develops too much gluten, making the crust tough. Stick to 8-10 minutes of kneading max. Also, ensure you’re using bread flour—all-purpose lacks the protein needed for proper structure. I notice the difference immediately when I switch flours.
Dough Too Sticky
This usually means too much liquid or not enough flour. Add 1-2 tbsp bread flour at a time while kneading until it reaches the right consistency. Humidity in Austin affects this—I often need extra flour on damp days. Work on a surface dusted with semolina flour to prevent sticking.
Flat or Limp Dough
Under-proofed dough lacks the strength to hold its shape. Let it rise until truly doubled in size during both rises. If your kitchen is cold, extend the first rise to 2-3 hours. I use my oven with the light on to create a warm proofing environment.
Burnt Bottoms
This happens with too-high heat or insufficient cornmeal. Dust your peel with 2 tbsp cornmeal before transferring. Bake on the middle rack at 475-500°F for 10-12 minutes. Rotate halfway through for even cooking. 🔥
Bland Flavor
Longer fermentation develops more complex flavors. Try cold-fermenting the dough in the fridge for 24-48 hours after the first rise. The slower rise at 38-40°F creates deeper flavor. I always taste the difference with this extra step.
Nutrition Facts
Frequently Asked Questions
Why does the dough need to rest twice?
The first rise develops flavor through fermentation. The second rest relaxes the gluten, making it easier to stretch without tearing. Skipping either step results in a denser crust.
Can I use all-purpose flour instead?
Yes, but add 1 tbsp vital wheat gluten per cup to mimic bread flour’s protein content. The texture won’t be quite as chewy, but it’ll still work well.
How do I know when the dough is ready to shape?
After the second rise, the dough should spring back slowly when poked. If it bounces back immediately, let it rest 10-15 more minutes.
What if my kitchen is too cold for rising?
Turn your oven light on to create a warm environment, or place the bowl near (not on) a heating pad set to low. Avoid direct heat sources.

- Potato Candy Recipe 1933: Vintage Peanut Butter Roll Delight - October 30, 2026
- Potato Chip Cookie Recipe With Pecans: Buttery Crunch Meets Nutty Richness - October 30, 2026
- Potato Patty Recipe No Egg: Crispy Edges Without the Binder - October 30, 2026