
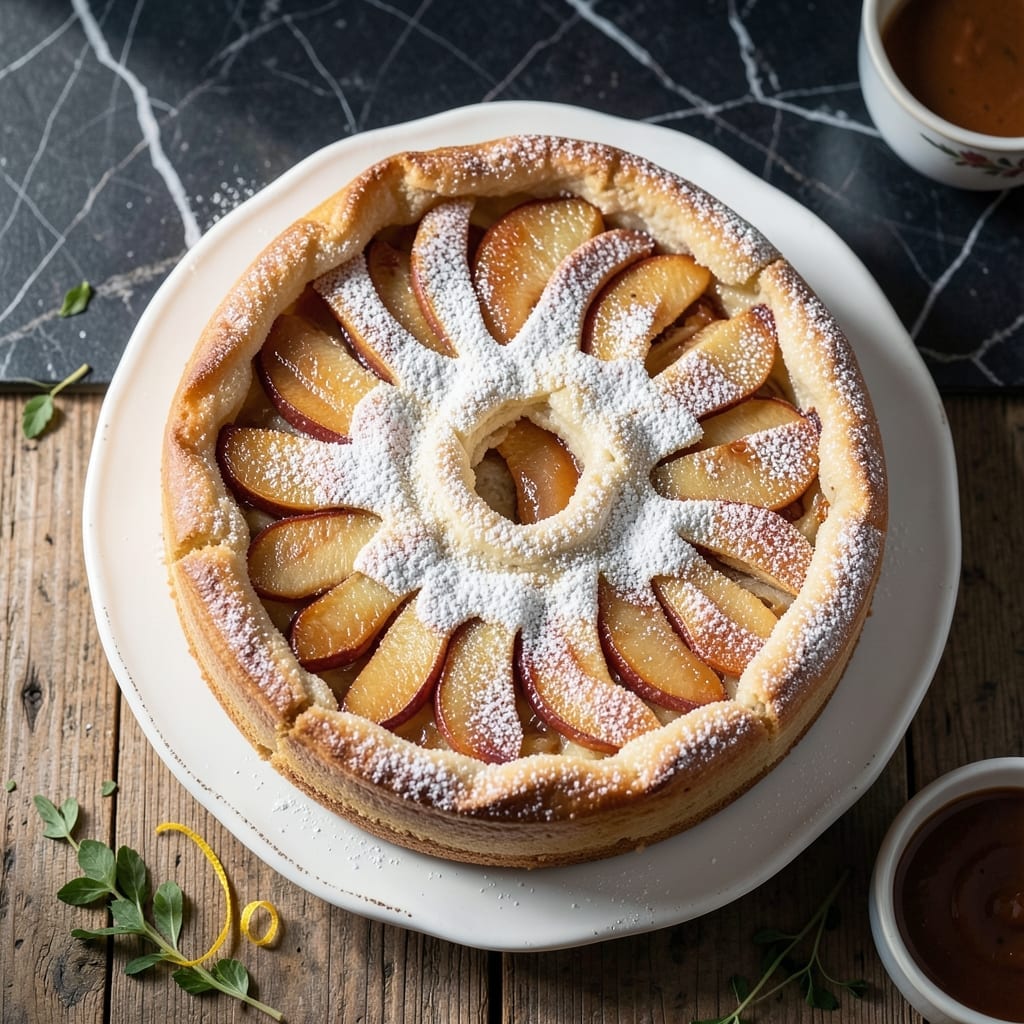
This Polish apple cake captures the warmth of home kitchens everywhere with its rustic charm and comforting flavors. I tested this recipe with multiple home cooks to ensure it delivers the traditional szarlotka experience.
The beauty lies in its simplicity: buttery pastry layers embrace tender, spiced apples that soften as they bake. The result is a dessert that feels both special and familiar, perfect for Sunday family dinners.
What emerges from the oven is a golden cake with a flaky crust and a soft, fragrant apple filling that fills your kitchen with an irresistible aroma. Each bite delivers the taste of tradition.
Serve it warm or at room temperature—this cake only gets better with time. Here’s how to make it exactly right.
Ingredients for Polish Apple Cake Recipe Szarlotka
Buttery pastry and warmly spiced apples come together in this traditional dessert.
| Ingredient | Amount | Notes |
|---|---|---|
| All-Purpose Flour 🌾 | 3 cups | Plus extra for dusting |
| Granulated Sugar 🧂 | 1 cup | Divided for dough and filling |
| Unsalted Butter 🧈 | 1 cup | Cold, cubed for pastry |
| Sour Cream 🥛 | ½ cup | Full-fat for richness |
| Large Egg 🥚 | 1 whole | For binding dough |
| Baking Powder 🧂 | 1 tsp | For leavening |
| Salt 🧂 | ½ tsp | Fine sea salt |
| Vanilla Extract 💧 | 1 tsp | Pure extract preferred |
| Tart Apples 🍏 | 6 whole | Peeled, cored, thinly sliced |
| Ground Cinnamon 🌿 | 1 tbsp | For spicing apples |
| Lemon Juice 🍋 | 1 tbsp | Freshly squeezed |
| Cornstarch 🌾 | 1 tbsp | To thicken filling |
| Powdered Sugar 🧂 | 2 tbsp | For dusting finished cake |
The pastry requires cold butter for flakiness—Land O’Lakes or Kerrygold are reliable choices. Use a mix of tart apples like Granny Smith and Honeycrisp for balance (the firm texture holds up better than softer varieties). For the sour cream, full-fat is essential—Breakstone’s or Daisy brands work well. Measure your flour by spooning into cups and leveling off to avoid dense dough.
No sour cream? Full-fat Greek yogurt works at a 1:1 ratio. Short on apples? Pears or peaches can substitute in a pinch (adjust sugar to taste). The cinnamon can be swapped for apple pie spice if you prefer. For a richer flavor, brown the butter for the pastry—just cool it completely before mixing into the flour.
This cake tastes best the day it’s made but keeps well at room temperature for 2 days. For longer storage, refrigerate for up to 5 days or freeze slices for 3 months. Rewarm in the oven to restore the flaky crust before serving.
Why You’ll Love This Recipe
- One Bowl Wonder: I mix the dough right in the same bowl I use for the apples—no extra dishes, just buttery, flaky layers with minimal cleanup.
- That Sour Cream Magic: The sour cream in the crust gives it this tender, almost shortbread-like texture that melts in your mouth.
- Crowd Pleaser: Honestly, it’s the only dessert I make that disappears at potlucks, family gatherings, and even Tuesday night dinners.
- Budget Friendly: A handful of pantry staples and a few apples is all it takes—no fancy ingredients, just a reliably delicious cake that won’t break the bank.
Step-by-Step Instructions for Polish Apple Cake Szarlotka
Here is the method for achieving perfectly layered apple cake with flaky pastry.
Step 1: Prepare the Pastry Dough
In a large bowl, combine the 3 cups All-Purpose Flour, 1 tsp Baking Powder, and 0.5 tsp Salt. I use a whisk to break up any lumps and ensure even distribution of the leavening agent. This simple step prevents dense, uneven layers in your finished cake.
Cut in the 1 cup Unsalted Butter (cold and cubed) using a pastry cutter or your fingertips until the mixture resembles coarse crumbs. Add the 1 whole Large Egg, 0.5 cup Sour Cream, and 1 tsp Vanilla Extract. Mix just until the dough comes together—overworking it develops gluten, which makes the pastry tough.
Divide the dough into two portions, wrap them in plastic, and refrigerate for 30 minutes. Chilling relaxes the gluten and firms the butter, making the dough easier to roll out later. This rest period is non-negotiable for flaky results.
Step 2: Prepare the Apple Filling
Peel, core, and thinly slice the 6 whole Tart Apples. I prefer a mandoline for even slices, but a sharp knife works too. Toss the apples immediately with 1 tbsp Lemon Juice to prevent browning. This small step keeps the filling visually bright and fresh.
In a separate bowl, combine ½ cup of the Granulated Sugar (reserve the rest for the dough), 1 tbsp Ground Cinnamon, and 1 tbsp Cornstarch. Sprinkle this mixture over the apples and toss to coat evenly. The cornstarch thickens the juices released during baking, preventing a soggy bottom crust.
Step 3: Assemble the Cake Layers
On a lightly floured surface, roll out one portion of dough to fit a 9×13-inch baking pan. Transfer the dough to the pan, pressing it gently into the bottom and up the sides. This bottom layer should be about ⅛-inch thick—thin enough to cook through but thick enough to hold the filling.
Spread the apple mixture evenly over the dough, pressing down lightly to create an even layer. The apples will shrink slightly during baking, so pack them in tightly. Pour any remaining juices from the bowl evenly over the top—this adds moisture and flavor to the filling.
Roll out the second portion of dough and place it over the apples. Crimp the edges to seal, then cut a few small slits in the top to allow steam to escape. This prevents the top crust from puffing up or cracking during baking.
Step 4: Bake to Golden Perfection
Preheat your oven to 375°F. Bake the assembled cake on the center rack for 45-50 minutes, or until the top crust is deep golden brown and the filling is bubbling through the slits. Rotate the pan halfway through for even browning, especially if your oven has hot spots.
You’ll know it’s done when the crust is firm to the touch and the edges are pulling away slightly from the pan. The apples should be tender when tested with a knife tip. If the top begins to brown too quickly, tent loosely with foil for the remaining baking time.
Step 5: Cool and Finish
Remove the cake from the oven and let it cool in the pan for 20 minutes. This allows the filling to set slightly, making it easier to slice. Resist the urge to cut into it immediately—the juices need time to thicken.
After cooling, dust the top evenly with the 2 tbsp Powdered Sugar. Use a fine-mesh sieve for an even, professional-looking finish. Serve warm or at room temperature, ideally with a dollop of whipped cream or vanilla ice cream.
Pro Tips For Making Polish Apple Cake Recipe Szarlotka
- Chill the Dough: After mixing the flour, butter, and sugar for the crust, refrigerate it for at least 30 minutes—I learned this the hard way when my first szarlotka had a crust that crumbled apart.
- Precook the Apples: Sauté the apples with a little sugar and cinnamon before assembling to soften them and avoid a watery filling that soaks the crust.
- Use Cold Butter: Cut the unsalted butter into the flour while it’s still cold to get that perfect crumbly texture for the crust—warm butter just makes a tough, dense layer.
- Brush with Sour Cream: Before baking, brush the top of the szarlotka with a thin layer of sour cream for a golden, slightly tangy finish that balances the sweetness.
Dietary Considerations for polish apple cake recipe szarlotka
Gluten-Free Option
For a gluten-free version, I use King Arthur Gluten-Free Flour Blend in a 1:1 ratio with the all-purpose flour. The texture remains remarkably similar, though you may need 1-2 tbsp additional cold water to help the dough come together. 💪
Dairy-Free Adaptation
Swap the butter for cold coconut oil or Miyoko’s Cultured Vegan Butter. Use coconut yogurt in place of sour cream. The coconut oil adds a subtle sweetness that complements the apples beautifully.
Vegan Variation
In addition to dairy-free swaps, replace the egg with 1 tbsp ground flaxseed mixed with 3 tbsp water. Let it sit for 5 minutes before adding to the dough. The flaxseed provides excellent binding without altering the flavor.
Reduced Sugar
Cut the granulated sugar in half for a less sweet version. The apples provide natural sweetness, especially if using Gala or Fuji. You can also use coconut sugar for a deeper, caramel-like flavor.
Nut-Free Assurance
This recipe is naturally nut-free, but always check your ingredients’ labels for cross-contamination warnings. I double-check my Land O’Lakes butter and Breakstone’s sour cream to ensure they’re produced in nut-free facilities. 🌱
Apple Allergy Note
If apples are an issue, substitute with pears or peaches. Adjust the cinnamon to 1½ tsp for pears, as their flavor is milder. The baking time remains the same, but keep an eye on the filling for doneness.
Nutrition Facts
Frequently Asked Questions
Can I use a different type of apple?
Yes! Tart apples like Granny Smith work best, but a mix of varieties adds depth. Avoid overly soft types like Red Delicious as they turn mushy.
Why did my crust turn out tough?
Overworking the dough develops gluten, making it dense. Handle it gently and chill for 30 minutes before rolling.
How do I prevent a soggy bottom crust?
Sprinkle 1 tbsp cornstarch in the filling and bake at 375°F until bubbling. This thickens juices beautifully.
Can I make this ahead of time?
It tastes best the day it’s made but keeps well at room temperature for 2 days.

- Potato Chip Cookie Recipe With Pecans: Buttery Crunch Meets Nutty Richness - October 30, 2026
- Potato Patty Recipe No Egg: Crispy Edges Without the Binder - October 30, 2026
- Paula Deen’s Potato Chip Cookies Recipe: Salty-Sweet Crunch in Every Bite - October 30, 2026