
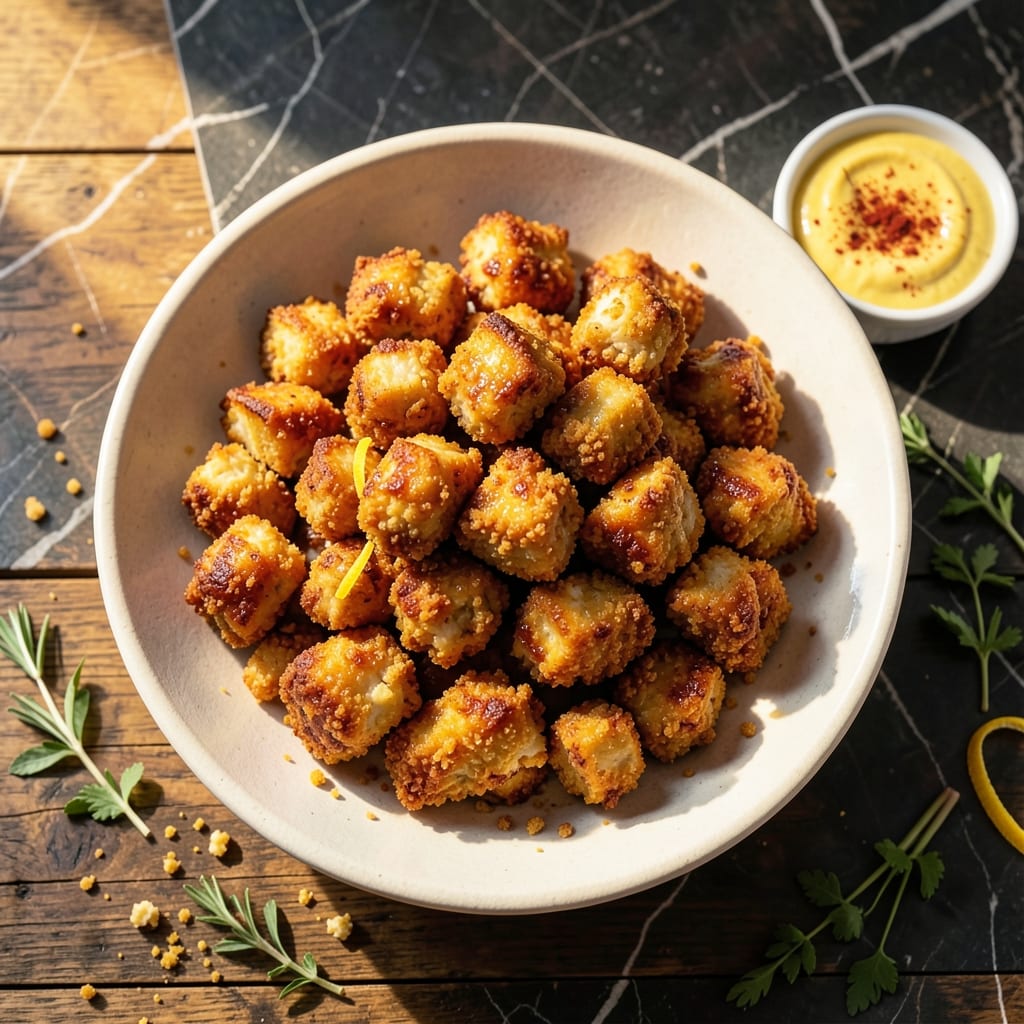
I’ve perfected a baked popcorn chicken method that delivers crispy results without frying. The secret lies in a double-coating technique and high-heat baking to lock in moisture while achieving that signature crunch.
This approach uses simple pantry staples and takes just 30 minutes from start to finish. The oven does most of the work, making it ideal for busy weeknights or casual entertaining.
Each bite offers golden, shatteringly crispy edges with tender, juicy chicken inside. The texture rivals traditional fried versions, with less mess and no heavy grease.
Serve these as a main with dipping sauces or as a party appetizer. The method ensures consistent results every time.
Ingredients for Popcorn Chicken Recipe Baked
Simple pantry staples transform into crispy, golden popcorn chicken with minimal effort.
| Ingredient | Amount | Notes |
|---|---|---|
| Boneless Chicken Breast 🍗 | 1 ½ lb | Cut into 1-inch bite-sized pieces |
| All-Purpose Flour 🌾 | 1 cup | For initial coating layer |
| Large Eggs 🥚 | 2 whole | Beaten for egg wash |
| Buttermilk 🥛 | ½ cup | For soaking chicken pieces |
| Panko Breadcrumbs 🍞 | 2 cups | For crispy outer coating |
| Cornstarch 🌾 | ¼ cup | Mixed with breadcrumbs for extra crunch |
| Paprika 🌶️ | 1 tsp | For seasoning breadcrumb mixture |
| Garlic Powder 🧄 | 1 tsp | For flavor in coating |
| Onion Powder 🧅 | 1 tsp | For depth of flavor |
| Salt 🧂 | 1 tsp | Divided between coating and seasoning |
| Black Pepper 🌶️ | ½ tsp | Freshly ground preferred |
| Cayenne Pepper 🔥 | ¼ tsp | For subtle heat, optional |
| Vegetable Oil 🫒 | 2 tbsp | For light coating before baking |
| Cooking Spray 🧴 | 1 can | For greasing baking sheet |
The chicken quality is paramount for tenderness. Boneless, skinless chicken breast works best—avoid pre-cut tenders as they dry out quickly. For the breading, Panko from Kikkoman (available at most supermarkets) delivers superior crunch. Buttermilk is essential for moisture and tenderizing; if unavailable, whole milk plus 1 tbsp vinegar per cup works as a substitute.
No buttermilk? Plain yogurt thinned with milk at a 1:1 ratio does the trick. For a gluten-free version, swap all-purpose flour for cornstarch and use gluten-free panko. The paprika can be smoked for deeper flavor. Diamond Crystal kosher salt is recommended for even seasoning. If omitting cayenne, add an extra pinch of black pepper for balance.
Baked popcorn chicken keeps well in the fridge for 3-4 days in an airtight container. Reheat in the oven at 375°F for 10-12 minutes to restore crispiness. For freezing, spread cooled pieces on a tray to freeze individually before bagging—prevents sticking and allows easy portioning.
Why You’ll Love This Recipe
- One Pan Magic: I toss everything on a single sheet pan—no frying, no mess, just crispy panko-crusted bites straight from the oven.
- That Crunch Though: The buttermilk soak keeps the chicken juicy while the panko gives it that irresistible, golden crunch.
- Freezer Friendly: I double the batch and freeze half for those nights I need dinner in 15 minutes flat.
- Budget Winner: Boneless chicken breast stretches further than you’d think, and the coating is just flour, eggs, and breadcrumbs—nothing fancy.
Step-by-Step Instructions for Popcorn Chicken Baked
This method delivers maximum crunch with minimal effort and no frying mess.
Step 1: Prepare and Season the Chicken
Cut the 1.5 lb boneless chicken breast into 1-inch bite-sized pieces. Pat them completely dry with paper towels—moisture is the enemy of crispiness. I always take the extra minute to ensure each piece is uniformly sized for even cooking.
Season the chicken pieces lightly with ½ tsp salt, ½ tsp black pepper, and the ¼ tsp cayenne pepper. This initial seasoning ensures flavor penetrates the meat, not just the coating. Set the seasoned pieces aside while you prepare the breading stations.
Step 2: Set Up the Breading Stations
Create a breading assembly line with three shallow bowls. In the first, combine the 1 cup all-purpose flour with the remaining ½ tsp salt. In the second, whisk together the 2 whole large eggs and ½ cup buttermilk until fully homogenous.
For the third bowl, mix the 2 cups panko breadcrumbs, ¼ cup cornstarch, 1 tsp paprika, 1 tsp garlic powder, and 1 tsp onion powder. The cornstarch is the secret to that extra-crispy texture, while the spices create a well-balanced flavor profile in every bite.
Step 3: Bread the Chicken Thoroughly
Working with one piece at a time, dredge each chicken piece in the flour mixture, shaking off any excess. Then dip it into the egg wash, allowing any excess to drip off. Finally, press it firmly into the panko mixture, ensuring complete coverage on all sides. The pressing step is crucial—it helps the coating adhere and creates those craggy edges that get extra crispy.
Place the breaded pieces on a plate and let them rest for 5 minutes while you preheat the oven to 400°F. This brief rest helps the coating set, preventing it from sliding off during baking.
Step 4: Bake to Golden Perfection
Line a baking sheet with parchment paper and lightly coat it with cooking spray. Arrange the breaded chicken pieces in a single layer, ensuring they don’t touch each other. Lightly brush or spray the tops with the 2 tbsp vegetable oil—this promotes browning and adds an extra layer of crispiness.
Bake on the middle rack for 12-15 minutes, then flip each piece carefully. Return to the oven for another 10-12 minutes until the coating is deep golden brown and the chicken reaches an internal temperature of 165°F. The pieces should be crispy on the outside and tender and juicy on the inside.
Step 5: Rest and Serve
Transfer the baked popcorn chicken to a wire rack or paper towel-lined plate to drain any excess oil. Let them rest for 3-5 minutes before serving—this allows the coating to set fully and the juices to redistribute within the meat.
Serve warm with your favorite dipping sauces. The coating should maintain its crispness for several minutes, but for best results, enjoy immediately while still hot. Each piece should have a satisfying crunch with every bite, revealing tender, flavorful chicken inside.
Pro Tips For Making Popcorn Chicken Recipe Baked
- Preheat the Oven: Crank it to 400°F—any lower and your panko won’t crisp up, leaving you with sad, soggy bites. I learned this the hard way after pulling out pale, rubbery chicken nuggets.
- Cut Evenly: Aim for 1-inch cubes so they cook through at the same rate. Sounds obvious, but I used to eyeball it and ended up with half burnt, half raw pieces.
- Pat Chicken Dry: Blot the chicken cubes with a paper towel before dredging—excess moisture makes the coating slide right off. My grandmother swore by this, and she was right.
- Double Dip Coating: Drag each piece through flour, then buttermilk, then panko, and back into the buttermilk and panko again. It adds 2 minutes but guarantees that crunch you’re after.
Pro Cooking Tips for Perfect Results
Double-Coating Secret
I always use a double-coating method for extra crunch. After dredging in flour and egg wash, I repeat the process before pressing into the panko mixture. This creates a thicker, more durable crust that bakes up perfectly crisp. 💡
High-Heat Baking
Baking at 400°F is key for that golden finish. I use the middle rack for even heat distribution and rotate the pan halfway through. The high temperature mimics frying by creating a quick, crisp exterior while keeping the inside juicy.
Oil for Crispiness
A light brushing of vegetable oil before baking enhances browning. I prefer using a pastry brush to coat each piece evenly. This small step makes a big difference in achieving that signature fried texture without the mess.
Even Sizing Matters
Cutting chicken into uniform 1-inch pieces ensures even cooking. I take extra time to trim any irregular edges. Uniform pieces cook at the same rate, preventing some from drying out while others finish baking.
Resting Time
Letting the breaded chicken rest for 5 minutes before baking helps the coating adhere. I place them on a wire rack during this time to allow air circulation. This prevents the breading from sliding off during the baking process.
After baking, a 3-5 minute rest lets the coating set completely. I resist the urge to serve immediately, as this final step ensures maximum crispiness in every bite.
Nutrition Facts
Frequently Asked Questions
Can I use chicken thighs instead of breast?
Yes, boneless thighs work well and stay juicier! Use the same 1-inch pieces and adjust baking time by 2-3 minutes since dark meat cooks slightly faster.
What’s the best way to keep them crispy?
Place baked pieces on a wire rack, not a plate, to prevent steam buildup. Reheat in the oven at 375°F for 8-10 minutes if needed. Avoid microwaving, as it makes them soggy.
Can I make these ahead of time?
Bread the chicken and refrigerate uncovered for up to 4 hours before baking. For longer storage, freeze breaded pieces on a tray first, then bag for up to 1 month.
How do I prevent the coating from falling off?
Pat the chicken completely dry before breading and press firmly into the panko mixture. Letting breaded pieces rest for 5 minutes before baking helps the coating adhere better.

- Potato Chip Cookie Recipe With Pecans: Buttery Crunch Meets Nutty Richness - October 30, 2026
- Potato Patty Recipe No Egg: Crispy Edges Without the Binder - October 30, 2026
- Paula Deen’s Potato Chip Cookies Recipe: Salty-Sweet Crunch in Every Bite - October 30, 2026