
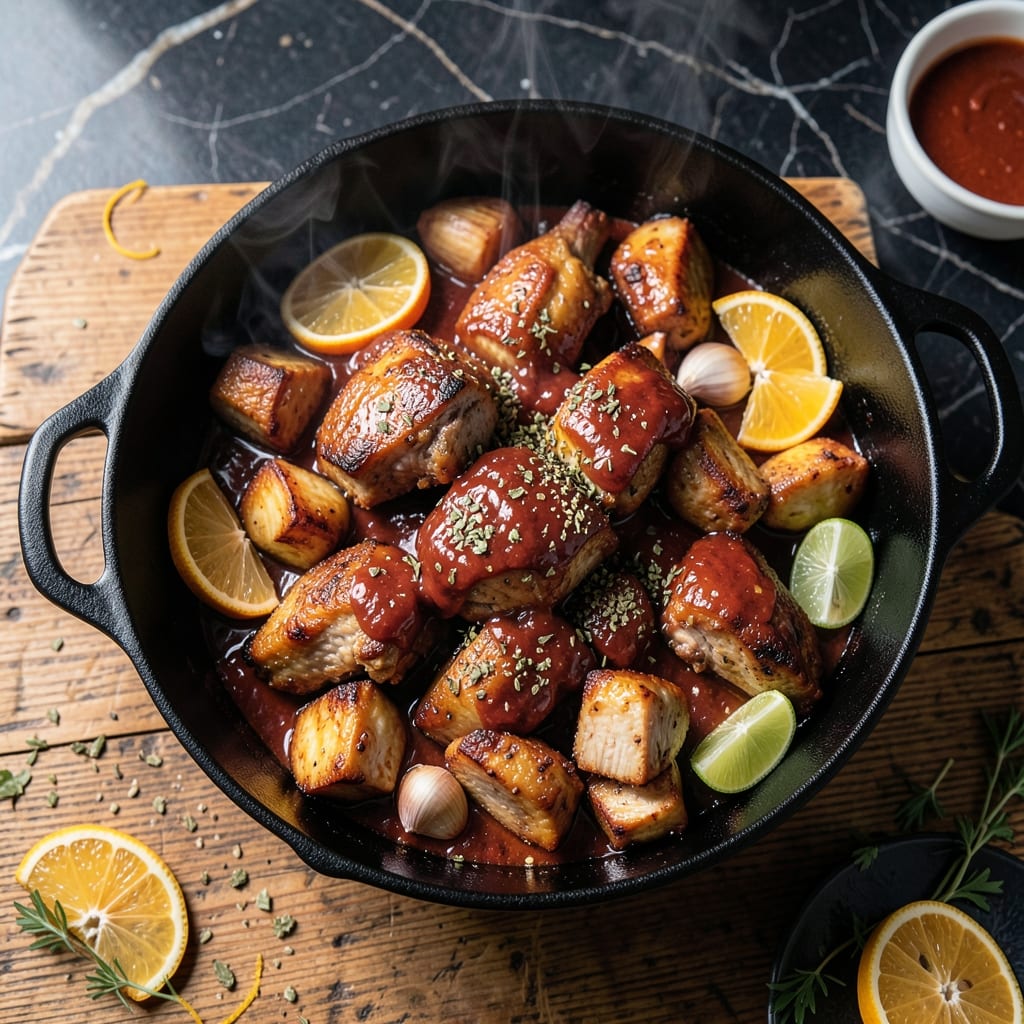
This Dutch oven method delivers the most tender, citrus-kissed carnitas you’ll ever make at home. The slow, even heat breaks down the pork until it shreds effortlessly, while the covered environment locks in moisture for fall-off-the-bone results.
The magic happens in the final phase, when you uncover the pot to let the pork crisp up in its own rendered fat. A blend of orange juice, lime, and spices infuses every bite with bright, authentic Mexican flavor without overwhelming the meat.
What you get is succulent pork with crispy edges, ready to serve in tacos, burritos, or bowls. The Dutch oven does all the work, ensuring consistent texture and rich flavor development with minimal effort.
Perfect for feeding a crowd or meal prepping for the week. This technique guarantees professional-quality carnitas every time.
Ingredients for Pork Carnitas Recipe Dutch Oven
Pantry staples and a few fresh ingredients create this citrusy, tender carnitas.
| Ingredient | Amount | Notes |
|---|---|---|
| Pork Shoulder 🐖 | 3 lb | Boneless, cut into chunks |
| Orange Juice 🍊 | 1 cup | Freshly squeezed preferred |
| Lime Juice 🍋 | ¼ cup | Freshly squeezed |
| Garlic Cloves 🧄 | 6 cloves | Minced for depth of flavor |
| Ground Cumin 🌿 | 1 tbsp | Toasted for warmth |
| Dried Oregano 🍃 | 1 tbsp | Mexican oregano if available |
| Chili Powder 🌶️ | 1 tbsp | Mild or hot variety |
| Bay Leaves 🌿 | 2 whole | For aromatic depth |
| Salt 🧂 | 1 ½ tsp | Kosher or sea salt |
| Black Pepper 🌶️ | 1 tsp | Freshly ground preferred |
| Olive Oil 🫒 | 2 tbsp | For crisping pork |
| Chicken Broth 🥣 | ½ cup | Low-sodium preferred |
| Cinnamon Stick 🌿 | 1 whole | Optional for warmth |
The pork shoulder is non-negotiable here. Look for bone-in or boneless—both work, but boneless saves time. Costco has great prices for large cuts, or ask your butcher to cube it for you. The fat marbling is key—it renders down to crisp the meat. I usually grab mine from Whole Foods when I want organic (worth it for the flavor).
No fresh oranges? Bottled orange juice works, but cut it with water so it’s not too sweet. Lime juice from a bottle is fine too (just check the label—no additives). Fresh out of cumin? Coriander at half the amount gives a different but still warm note. The cinnamon stick is optional, but adds a subtle depth (don’t skip the bay leaves though).
Leftovers taste even better the next day. Store in the fridge for up to 4 days or freeze for 3 months. I portion mine into bags so tacos are ready in minutes (just reheat in a skillet to crisp up).
Why You’ll Love This Recipe
- Set It and Forget: The dutch oven does all the work—just sear the pork shoulder, add orange and lime juice with garlic and cumin, then let it braise.
- Citrus Zing: That combo of orange and lime juice breaks down the pork into tender, flavor-packed bites with just the right tang.
- Taco Night Hero: I use these carnitas for tacos, burrito bowls, or nachos—one recipe, endless meals.
- Budget Feast: Pork shoulder is cheap, and this makes enough for leftovers that taste even better the next day.
Step-by-Step Instructions for Carnitas in a Dutch Oven
Here’s my no-fail method for tender, citrus-kissed carnitas with crispy edges.
Step 1: Season and Sear the Pork
Pat the 3 lb pork shoulder chunks dry with paper towels. In a bowl, combine the 1.5 tsp salt, 1 tsp black pepper, 1 tbsp ground cumin, 1 tbsp dried oregano, and 1 tbsp chili powder. Rub this spice blend all over the pork, pressing it in so it adheres well.
Heat 2 tbsp olive oil in your Dutch oven over medium-high heat. Working in batches, sear the pork until browned on all sides, about 3-4 minutes per side. Don’t overcrowd the pan—this ensures proper browning instead of steaming. Transfer the seared pork to a plate and set aside.
Step 2: Build the Flavor Base
In the same Dutch oven, add the 6 cloves minced garlic cloves. Sauté for 30 seconds until fragrant, stirring constantly to prevent burning. The garlic should turn just light golden—if it browns, it’ll turn bitter.
Pour in the 1 cup orange juice, 0.25 cup lime juice, and 0.5 cup chicken broth. Add the 2 whole bay leaves and 1 whole cinnamon stick. Stir to combine, scraping up any browned bits from the bottom of the pot. These bits are packed with flavor and will enrich your sauce.
Step 3: Braise Until Tender
Return the seared pork to the Dutch oven, along with any accumulated juices. The liquid should come about halfway up the pork—if it doesn’t, add a splash of water. Bring to a simmer, then reduce heat to low. Cover and let it braise for 2 to 2.5 hours, turning the pork occasionally.
You’ll know it’s done when the pork shreds easily with a fork and reaches an internal temperature of 195°F. The meat should be so tender it nearly falls apart when you try to lift it. If the liquid reduces too much during cooking, add a little water to maintain the braising level.
Step 4: Crisp and Serve
Once the pork is tender, remove the lid and increase heat to medium-high. Let the carnitas cook uncovered for 10-15 minutes, stirring occasionally, until the liquid has mostly evaporated and the pork begins to crisp at the edges.
Use a fork to shred the pork directly in the pot, mixing it with the remaining cooking liquid. The result should be juicy, flavorful carnitas with some pieces slightly crispy. Discard the bay leaves and cinnamon stick before serving. These carnitas are perfect for tacos, burritos, or simply piled onto a plate with your favorite sides.
Pro Tips For Making Pork Carnitas Recipe Dutch Oven
- Brown the Pork Well: I learned this the hard way—sear the pork shoulder in batches in the Dutch oven until deeply browned, about 4-5 minutes per side. Skipping this step leaves the carnitas bland and pale, no matter how long you braise it.
- Use Fresh Citrus: After using bottled juice once and regretting it, I now squeeze oranges and limes fresh. The bright, sharp acidity cuts through the fat in a way pre-squeezed just can’t.
- Don’t Drown the Meat: Resist the urge to add too much liquid upfront. The pork releases its own juices, so start with just enough orange and lime juice to cover the bottom of the Dutch oven—about 1 cup total.
- Shred While Hot: Sounds weird, but it works: pull the pork apart straight from the Dutch oven while it’s still piping hot. It absorbs the braising liquid better, and you’ll get those crispy edges faster when you broil or fry it afterward.
Essential Equipment for This Recipe
Dutch Oven Essentials
For carnitas, a 5-7 quart enamel-coated Dutch oven is ideal. I swear by my Le Creuset—it distributes heat evenly and the enamel makes cleanup a breeze. The heavy lid traps steam perfectly for fall-apart tender pork.
Alternative Options
If you’re on a budget, Lodge’s enameled cast iron delivers similar performance for half the price. Avoid thin-walled pots—they can’t maintain steady low heat for the 2-2.5 hour braise. 💡
Key Tools
A tong set helps turn pork chunks without piercing, preserving juices. I also keep a fat separator handy to skim excess rendered fat before the final crisping phase.
Temperature Control
An instant-read thermometer is crucial for checking the pork reaches 195°F internally. I use ThermoWorks’ Thermapen for its speed and accuracy. The difference between 190°F and 195°F can mean perfectly tender versus tough.
Serving Prep
Have corn tortillas and toppings ready before you start. I warm tortillas wrapped in a damp towel in the microwave for 30 seconds while the pork crisps. Fresh cilantro, diced onion, and lime wedges make perfect garnishes.
Cleanup Tip
Let the Dutch oven soak in warm soapy water for 10 minutes after cooking. The enamel surface releases browned bits easily with a wooden spoon. Never use metal utensils—they can scratch the coating. 🔥
Nutrition Facts
Frequently Asked Questions
Can I make this ahead of time?
The flavor improves after 24 hours in the fridge. Store in an airtight container and reheat in a skillet to crisp the edges.
What if my Dutch oven is too small?
Use a heavy pot with a tight lid. A 5-7 quart is ideal, but 6 quarts works if you reduce the batch size by 1 lb.
Why is my pork tough?
It likely didn’t reach 195°F internally. Braise longer, adding 1/2 cup water if needed, until it shreds easily.
Can I skip the searing step?
Not recommended. Searing develops deep flavor and color. If short on time, sear just 2 sides per chunk.

- Potato Chip Cookie Recipe With Pecans: Buttery Crunch Meets Nutty Richness - October 30, 2026
- Potato Patty Recipe No Egg: Crispy Edges Without the Binder - October 30, 2026
- Paula Deen’s Potato Chip Cookies Recipe: Salty-Sweet Crunch in Every Bite - October 30, 2026