
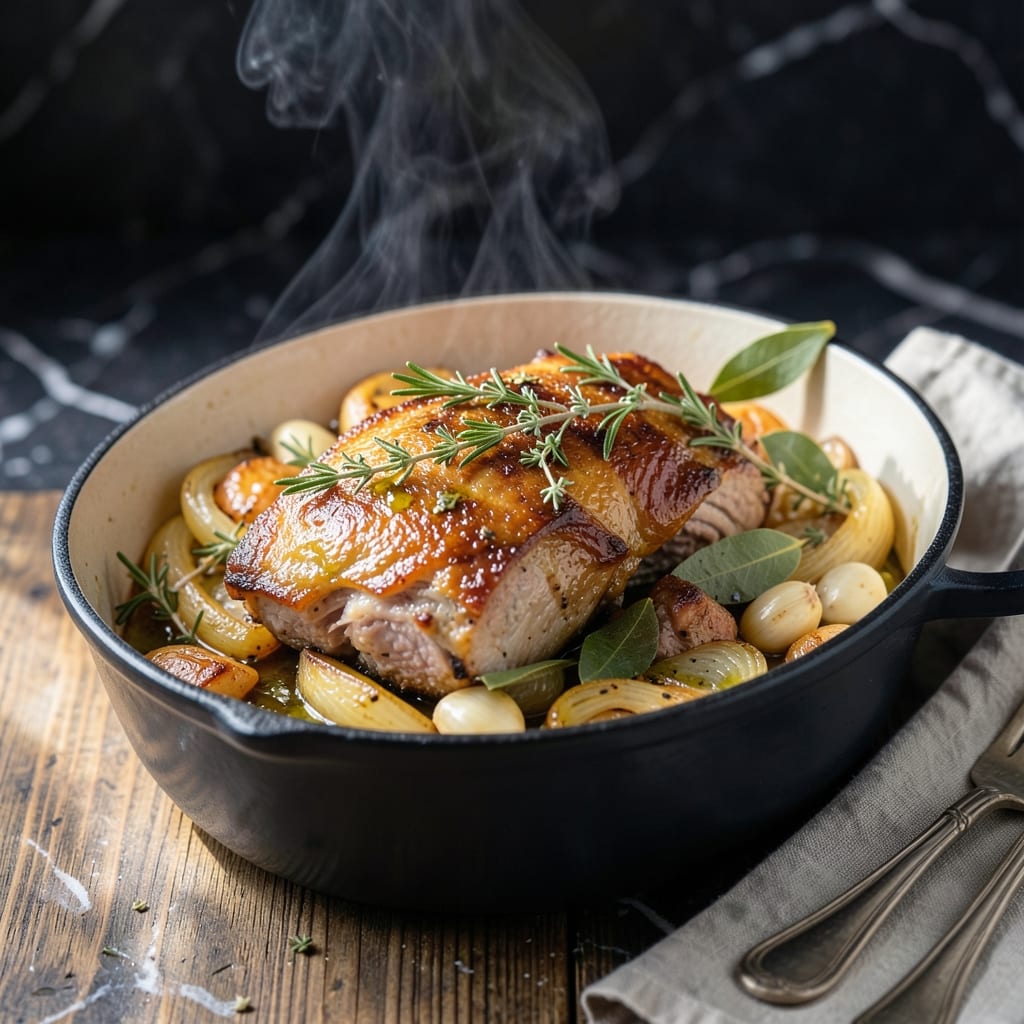
There’s something deeply satisfying about perfectly braised pork that falls apart at the touch of a fork. This method transforms tough cuts into tender, flavorful meat that melts in your mouth.
I developed this recipe testing different equipment to ensure consistent results. The slow braising process allows the garlic and herbs to infuse every bite, creating a depth of flavor that’s hard to beat.
The secret is patience—low heat and time work together to break down the meat fibers while keeping it juicy. The garlic becomes sweet and mellow, the herbs release their aromatic oils, and the pork soaks up every bit of flavor.
Serve this with mashed potatoes or crusty bread to soak up the rich sauce. The results speak for themselves.
Ingredients for Pork Recipe Yummy Kitchen
Tough cuts transform into melt-in-your-mouth perfection with these pantry staples and fresh herbs.
| Ingredient | Amount | Notes |
|---|---|---|
| Pork Shoulder 🥩 | 2 ½ lb | Bone-in, cut into large chunks |
| Garlic Cloves 🧄 | 8 cloves | Peeled, smashed for maximum flavor |
| Yellow Onion 🧅 | 1 whole | Large, sliced into thick rings |
| Fresh Rosemary 🌿 | 2 tbsp | Chopped, stems discarded |
| Fresh Thyme 🍃 | 2 tbsp | Chopped, stems discarded |
| Bay Leaves 🌿 | 2 whole | Dried, for aromatic depth |
| Chicken Stock 🍲 | 2 cups | Low-sodium preferred for control |
| Dry White Wine 🍷 | ½ cup | Sauvignon Blanc or Pinot Grigio |
| Olive Oil 🫒 | 2 tbsp | Extra-virgin for richness |
| Kosher Salt 🧂 | 1 ½ tsp | Diamond Crystal preferred |
| Black Pepper 🌶️ | 1 tsp | Freshly ground for best flavor |
| Apple Cider Vinegar 🍏 | 1 tbsp | Adds brightness to braise |
| Tomato Paste 🍅 | 2 tbsp | For umami depth (the good stuff) |
Pork shoulder is non-negotiable here—bone-in, well-marbled cuts from Whole Foods or your local butcher ensure the best results. The fat renders down during the long braise, basting the meat from within. I always ask for a 4-5 lb roast and cut it myself (saves money and lets you control the chunk size). The garlic? Fresh heads from the farmers market have more punch than pre-peeled cloves.
No white wine? Substitute with extra chicken stock plus a splash of lemon juice. Fresh out of rosemary or thyme? Dried herbs at half the amount work, but fresh is ideal. If you’re avoiding alcohol, apple cider vinegar with a pinch of sugar mimics the acidity. The pork can be swapped for beef chuck if needed, but adjust cooking time—beef takes about 30 minutes longer to get that fall-apart texture.
This tastes even better the next day once the flavors meld. Store in an airtight container in the fridge for up to 4 days or freeze for 3 months. Reheat gently on the stovetop with a splash of water (microwaving can dry it out).
Why You’ll Love This Recipe
- I’ll be real: this makes enough for dinner tonight and sandwiches tomorrow.
- One Pan Wonder: It’s just pork shoulder, garlic, onion, and herbs tossed together—minimal prep, maximum payoff.
- Herb-Infused Heaven: The rosemary and thyme soak into the pork, making every bite ridculously good.
- Feeds a Crowd: I’ll be real: this makes enough for dinner tonight and sandwiches tomorrow.
Step-by-Step Instructions for Slow-Braised Pork With Garlic and Herbs
This method guarantees fall-apart tender pork with rich, aromatic depth every time.
Step 1: Sear the Pork Shoulder for Deep Flavor
Heat the 2 tbsp olive oil in a heavy Dutch oven over medium-high heat until shimmering. Pat the 2.5 lb pork shoulder chunks dry with paper towels, then season generously with the 1.5 tsp kosher salt and 1 tsp black pepper.
Working in batches if needed, sear the pork on all sides for 8-10 minutes total until deeply browned. Don’t crowd the pan—this ensures a proper sear rather than steaming. Transfer the browned pork to a plate and set aside.
Step 2: Build the Aromatic Base
In the same pot, add the sliced 1 whole yellow onion and cook for 3-4 minutes until softened and starting to brown. Add the 8 cloves garlic cloves, 2 tbsp fresh rosemary, 2 tbsp fresh thyme, and 2 whole bay leaves, stirring for 1 minute until fragrant.
Push the aromatics to one side, then add the 2 tbsp tomato paste to the cleared space. Cook for 1-2 minutes, stirring constantly, until it darkens slightly and smells sweet and rich. This step builds the foundation of flavor for the braise.
Step 3: Deglaze and Begin the Braise
Pour in the 0.5 cup dry white wine and scrape up all the browned bits from the bottom of the pot with a wooden spoon. Let it simmer for 2-3 minutes until reduced by half. This deglazing captures all the concentrated flavors from searing.
Return the pork to the pot along with any accumulated juices. Add the 2 cups chicken stock and 1 tbsp apple cider vinegar. The liquid should just cover the pork—add a splash of water if needed. Bring to a gentle simmer.
Step 4: Slow-Braise to Tenderness
Cover the pot and transfer it to a preheated 325°F oven. Braise for 2.5 to 3 hours, turning the pork occasionally, until it shreds easily with a fork. The pork is done when it pulls apart with minimal resistance.
Check the liquid level halfway through—if it’s reducing too quickly, add a bit more chicken stock. The low, steady heat ensures the connective tissue breaks down slowly for that melt-in-your-mouth texture.
Step 5: Reduce the Sauce and Serve
Carefully transfer the pork to a serving dish. Skim excess fat from the surface of the braising liquid, then simmer it on the stovetop over medium heat for 5-7 minutes until it thickens slightly and coats the back of a spoon.
Pour the reduced sauce over the pork and let it soak in for 5 minutes before serving. The sauce should be rich and glossy, clinging to each piece of pork. Serve with crusty bread or mashed potatoes to soak up every last drop.
Pro Tips For Making Pork Recipe Yummy Kitchen
- Score the Fat: Cut 1/4-inch deep crosshatches in the pork shoulder fat cap—this lets the rosemary and thyme rub penetrate deeper and renders the fat more evenly.
- Bloom the Herbs: Heat the fresh rosemary and thyme in a little oil for 30 seconds before adding onions to release their oils and boost flavor.
- Skip the Cold Start: Always bring pork shoulder to room temperature before roasting, or the outer layers will overcook while the center catches up.
- Rest Before Serving: Let the pork rest 15-20 minutes under foil after cooking so the juices redistribute—I learned this the hard way after carving too soon and watching all the moisture escape.
Dietary Considerations for This Recipe
Gluten-Free Friendly
This braised pork is naturally gluten-free as written, making it safe for anyone with celiac disease or gluten sensitivity. Just ensure your chicken stock is certified gluten-free—I recommend Imagine Foods brand. 💪
Low-Carb Option
For keto or low-carb diets, skip the bread and serve this over cauliflower mash instead. The pork itself contains only 2g net carbs per serving. David and I often enjoy it this way for a satisfying, carb-conscious meal.
Dairy-Free Adaptation
There’s no dairy in this recipe, so it’s perfect for lactose-intolerant diners. If you’re serving with mashed potatoes, use olive oil or chicken broth instead of butter and milk. The pork’s richness stands on its own.
Allergen Notes
The main allergens to watch are the wine and stock. For wine allergies, substitute with extra chicken stock plus 1 tbsp apple cider vinegar. Always check stock labels for soy or egg derivatives if those are concerns.
Sodium Control
Using low-sodium chicken stock and Diamond Crystal kosher salt lets you control the salt level precisely. I reduce the salt to 1 tsp when serving guests with blood pressure concerns. The long braise still extracts plenty of flavor.
Paleo-Friendly
This recipe aligns perfectly with paleo guidelines as written. All ingredients—pork, herbs, vinegar, and stock—are paleo-approved. Just confirm your stock has no added sugars or preservatives. Honestly, it’s one of my go-to paleo meals. ✨
Nutrition Facts
Frequently Asked Questions
Can I use a different cut of pork?
Pork shoulder works best, but pork butt is a great substitute. Avoid lean cuts like tenderloin—they dry out during long braising. For best results, choose cuts with good marbling and connective tissue.
How do I know when it’s done?
The pork is ready when it shreds easily with a fork. This typically takes 2.5 to 3 hours at 325°F. If it resists pulling apart, give it more time—the collagen needs to fully break down.
Can I make this in a slow cooker?
Yes! Sear the pork first, then transfer everything to a slow cooker. Cook on low for 6-8 hours or high for 4-5 hours. The texture will be slightly different but still delicious.
Can I use dried herbs instead of fresh?
Use 1 tbsp dried rosemary and 1 tbsp dried thyme as a substitute. Dried herbs are more concentrated, so you need less. Add them when you sear the pork to bloom their flavors.

- Potato Chip Cookie Recipe With Pecans: Buttery Crunch Meets Nutty Richness - October 30, 2026
- Potato Patty Recipe No Egg: Crispy Edges Without the Binder - October 30, 2026
- Paula Deen’s Potato Chip Cookies Recipe: Salty-Sweet Crunch in Every Bite - October 30, 2026