
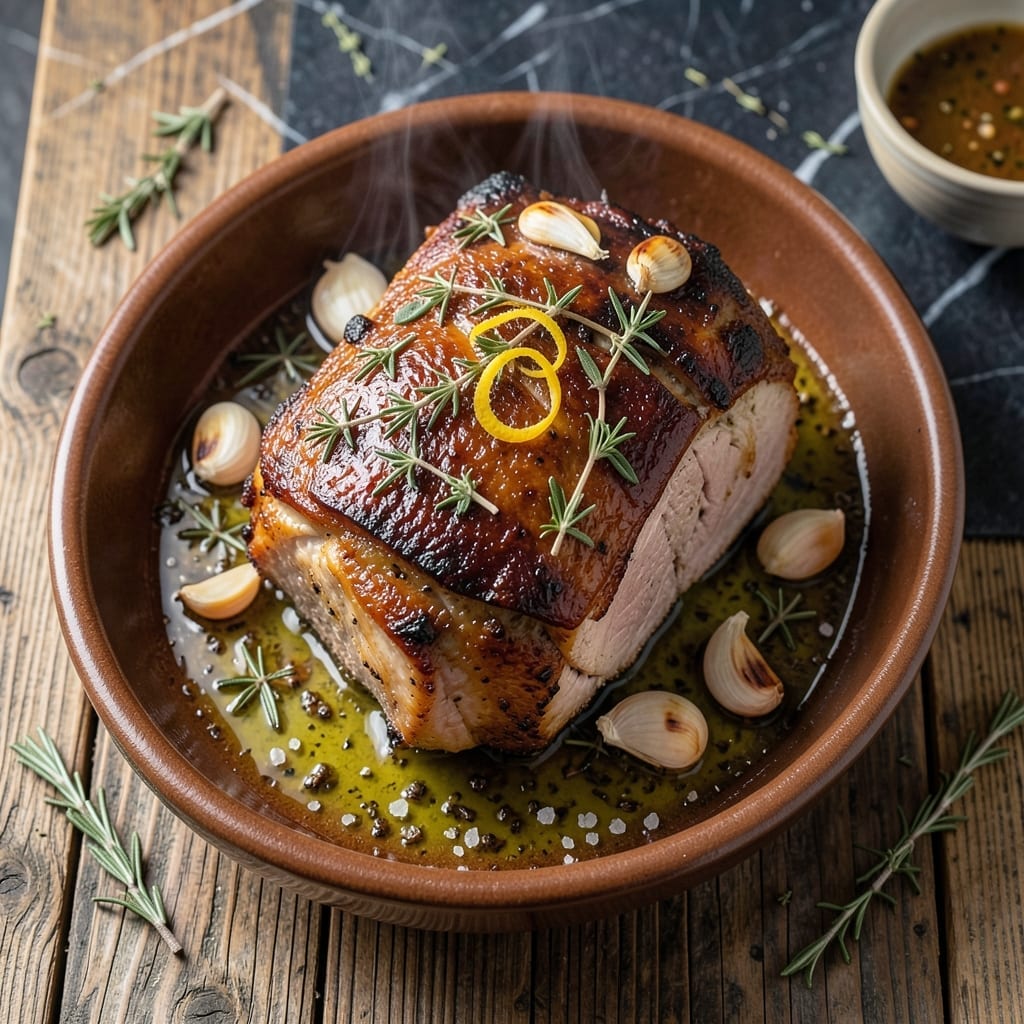
This herb-crusted pork roast delivers succulent results with every bite, proving that oven cooking can rival any slow cooker. The secret lies in a simple rub and precise timing.
I’ve perfected this method to ensure the meat stays juicy while developing a golden, flavorful crust. The herbs infuse every slice, making it a standout main course.
What you’ll get is tender, aromatic pork with a crisp exterior, ready to impress at any dinner table. The oven does most of the work, leaving you free to prepare sides.
Serve with roasted vegetables or mashed potatoes for a complete, satisfying meal. Here’s how to achieve it.
Ingredients for Pork Roast Recipe Oven
Pantry staples meet fresh herbs for a roast that’s anything but ordinary.
| Ingredient | Amount | Notes |
|---|---|---|
| Pork Shoulder Roast 🥩 | 3 lb | Bone-in for best flavor |
| Fresh Rosemary 🌿 | 2 tbsp | Chopped, stems discarded |
| Fresh Thyme 🍃 | 2 tbsp | Leaves only, chopped |
| Garlic Cloves 🧄 | 6 cloves | Minced for rub |
| Olive Oil 🫒 | ¼ cup | Extra-virgin preferred |
| Kosher Salt 🧂 | 2 tsp | Diamond Crystal recommended |
| Black Pepper 🌶️ | 1 tsp | Freshly ground |
| Dijon Mustard 🟡 | 2 tbsp | For crust binding |
| Dry White Wine 🍷 | ½ cup | Optional for deglazing |
| Chicken Stock 🥣 | 1 cup | Low-sodium preferred |
| Yellow Onion 🧅 | 1 whole | Sliced for base |
| Carrots 🥕 | 3 whole | Peeled, cut into chunks |
| Celery Stalks 🥬 | 3 pieces | Cut into chunks |
The pork shoulder is key here—bone-in from Costco or Whole Foods gives you that juicy, fall-apart texture (boneless works too, but you’ll miss some flavor). Look for good marbling, not the leanest cut. Fresh herbs matter more than you’d think; grab them from the produce section (the prepackaged kind in the fridge section is fine in a pinch). The garlic? Smash it first for easier mincing—saves time and your knife.
No fresh herbs? Dried at one-third the amount works, but fresh is better. Out of Dijon? Whole-grain mustard adds a nice texture. The white wine is optional—sub extra chicken stock with a splash of vinegar. Don’t have pork shoulder? Pork loin works but cooks faster (watch the temp). The veggies can be swapped for whatever’s in your crisper.
Leftovers keep in the fridge for 4-5 days—perfect for sandwiches. Freeze for up to 3 months (slice first for easy portions). The herb mix can be prepped a day ahead (store in the fridge). Always bring pork to room temp before roasting—worth the extra 30 minutes.
Why You’ll Love This Recipe
- Set and Forget: The pork shoulder goes straight from the fridge to the oven with just a quick rub of olive oil, garlic, and herbs. No babysitting required.
- Herb Magic: Rosemary and thyme crust the meat with earthy depth while garlic melts into every bite. Honestly, it smells like a restaurant in here.
- Sunday to Monday: Leftovers shred beautifully for tacos, sandwiches, or fried rice. I’ll be real: it tastes even better the next day.
- Budget Hero: A shoulder roast feeds my whole family for pennies per serving. One pan, one meal, zero guilt.
Step-by-Step Instructions for Herb-Crusted Pork Roast
This method guarantees tender meat with a flavorful crust and rich pan sauce.
Step 1: Create the Herb and Garlic Rub
In a small bowl, combine the 2 tbsp Fresh Rosemary, 2 tbsp Fresh Thyme, 6 cloves Garlic Cloves, 2 tsp Kosher Salt, 1 tsp Black Pepper, and 0.25 cup Olive Oil. I like to use my fingers to really work the herbs and garlic into the oil so the flavors meld together.
Rub this mixture all over the 3 lb Pork Shoulder Roast, making sure to get into every crevice. The bone-in cut has more surface area for the rub to cling to, which means more flavor in every bite. Let it sit at room temperature for 30 minutes while you prep the rest—this takes the chill off for more even cooking.
Step 2: Sear the Pork for a Golden Crust
Preheat your oven to 375°F. Heat a large Dutch oven or heavy pot over medium-high heat. Add the pork and sear undisturbed for 4-5 minutes per side until deeply browned. You’ll hear it sizzle and see the edges start to crisp—that’s the Maillard reaction working its magic.
Spread the 2 tbsp Dijon Mustard over the seared pork. This not only adds tang but creates a sticky base for the herbs to adhere to as it roasts. Don’t skip this step—it’s what makes the crust so irresistible.
Step 3: Roast with Aromatic Vegetables
Add the 1 whole Yellow Onion, 3 whole Carrots, and 3 pieces Celery Stalks to the pot around the pork. These will flavor the cooking liquid and become part of the sauce later. Pour in the 1 cup Chicken Stock and 0.5 cup Dry White Wine—the liquid should come about halfway up the pork.
Cover and transfer to the oven. Roast for 2 to 2½ hours, turning and basting the pork every 45 minutes. You’ll know it’s ready when the meat pulls apart easily with a fork and reaches an internal temperature of 195°F.
Step 4: Rest and Shred for Serving
Remove the pork from the oven and transfer it to a cutting board. Let it rest for 15 minutes—this allows the juices to redistribute so every bite stays moist. While it rests, skim any excess fat from the cooking liquid and simmer it on the stovetop for 5 minutes to reduce slightly.
Shred the pork using two forks, discarding any large fat pieces. Serve the pork on a platter, spooning the reduced cooking liquid and vegetables over the top. The meat should be fall-apart tender with a rich, herby sauce that soaks into every piece.
Pro Tips For Making Pork Roast Recipe Oven
- Start Hot, Finish Low: Sear the pork shoulder at 450°F for 20 minutes first, then drop to 325°F—this locks in juices and gives that crispy crust I used to struggle with before I got the timing right.
- Score the Fat: Cut 1/4-inch slits in the fat cap before seasoning so the rosemary, thyme, and garlic actually penetrate instead of just sitting on top.
- Don’t Overcrowd the Pan: Use a roasting pan just big enough for the pork so the herbs and oil don’t spread too thin—this keeps the flavors concentrated where they belong.
- Rest Under Foil: Let it rest 15-20 minutes covered loosely with foil after roasting; I learned this the hard way after carving into a dry roast too soon.
Pro Cooking Tips for This Dish
Perfect Temperature Control
Preheat your oven to 375°F and maintain it precisely—I use an oven thermometer to verify, as many home ovens run 10-15°F off. This temperature is ideal for breaking down collagen in pork shoulder while keeping it moist. 🌡️
Searing for Flavor
Sear the pork in a Dutch oven over medium-high heat for 4-5 minutes per side until deeply browned. Don’t rush this step—the Maillard reaction needs time to develop those complex flavors. I recommend Lodge enameled cast iron for even heat distribution.
Basting for Juiciness
Turn and baste the pork every 45 minutes during roasting. This keeps the surface moist and ensures the herb crust doesn’t dry out. Use the pan juices for basting—they’re packed with flavor and help build a beautiful glaze on the exterior.
Internal Temp is Key
Use a meat thermometer to monitor internal temperature. Pork shoulder is done at 195°F when it’s fall-apart tender. I like the ThermoPro TP20 for its accuracy and dual probes. Don’t rely on time alone—temperature is the only sure indicator. 💡
Resting Matters
Let the pork rest for at least 15 minutes before shredding. This allows juices to redistribute, so they don’t all end up on your cutting board. Cover it loosely with foil to keep it warm while resting.
Reduce the Pan Sauce
After removing the pork, simmer the cooking liquid for 5 minutes to concentrate flavors. Skim off excess fat first for a cleaner sauce. This step transforms good pan juices into an incredible sauce that elevates the dish.
Nutrition Facts
Frequently Asked Questions
What temperature should the oven be set to?
Preheat your oven to 375°F for even cooking. This temperature breaks down collagen in the pork while keeping it moist.
How long does it take to cook?
Roast for 2 to 2½ hours, turning and basting every 45 minutes. The pork is ready when it reaches an internal temperature of 195°F.
Can I use a different cut of pork?
Yes, pork loin works but cooks faster—watch the temperature closely. Pork shoulder is ideal for its marbling and tenderness.
Why is resting important after cooking?
Resting for 15 minutes lets juices redistribute, ensuring every bite stays moist. Skipping this step can leave the meat dry.

- Beefaroni Recipe With Tomato Soup: One-Pot Nostalgic Comfort - September 28, 2026
- Bread Recipe KitchenAid Mixer: Foolproof Loaf With Perfect Rise - September 28, 2026
- BBQ Oysters Recipe Grill: Smoky Garlic Butter Bliss - September 28, 2026