
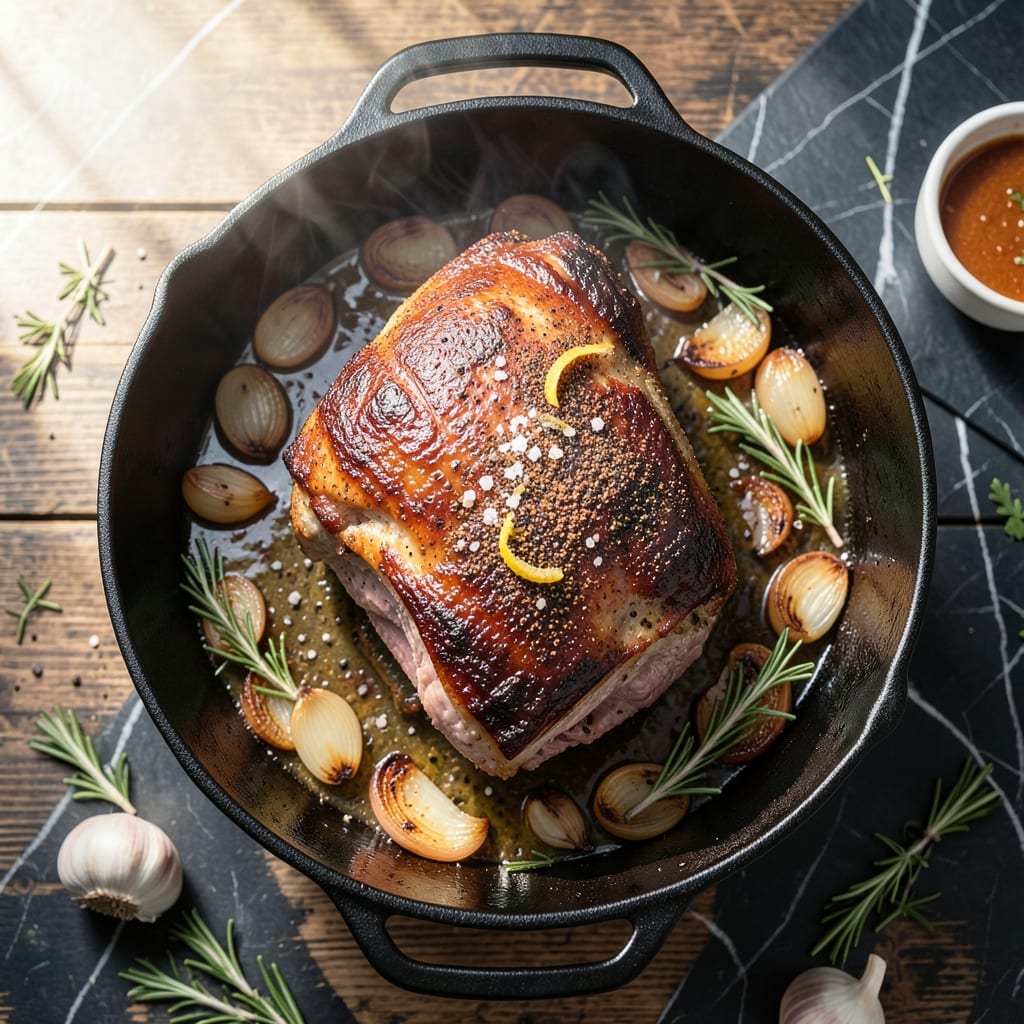
This oven-roasted pork shoulder butt transforms tough cuts into pull-apart tender perfection with minimal effort. The slow roasting process breaks down connective tissue, creating meat that melts at the touch of a fork.
I’ve refined this method over years of Sunday dinners, focusing on a simple dry rub and low, steady heat. The result is juicy, flavorful pork with a caramelized crust that forms naturally as it cooks.
What you’ll get is a centerpiece dish that feeds a crowd or provides leftovers for days. The meat shreds easily, making it ideal for sandwiches, tacos, or serving alongside your favorite sides.
No fancy techniques—just patience and the right temperature. The oven does all the work while you relax.
Ingredients for Pork Shoulder Butt Roast Recipe in Oven
Nothing exotic here—just good stuff for pork that falls apart on its own.
| Ingredient | Amount | Notes |
|---|---|---|
| Pork Shoulder Butt 🥩 | 4 lb | Bone-in, skin-on preferred |
| Kosher Salt 🧂 | 2 tbsp | Diamond Crystal preferred |
| Black Pepper 🌶️ | 1 tbsp | Freshly ground, coarse |
| Garlic Powder 🧄 | 2 tbsp | Not garlic salt |
| Onion Powder 🧅 | 1 tbsp | Fresh ground preferred |
| Smoked Paprika 🌶️ | 1 tbsp | Sweet or hot variety |
| Brown Sugar 💰 | ½ cup | Light or dark, packed |
| Apple Cider Vinegar 🍏 | ¼ cup | For acidity and balance |
| Olive Oil 🫒 | 2 tbsp | Extra-virgin for richness |
| Yellow Onion 🧅 | 1 whole | Large, quartered |
| Carrots 🥕 | 3 whole | Peeled, chopped into chunks |
| Celery Stalks 🥬 | 3 pieces | Chopped into large pieces |
| Chicken Stock 🥣 | 1 cup | Low-sodium preferred |
| Bay Leaves 🌿 | 2 pieces | Dried, whole |
The pork shoulder is the star. Bone-in, skin-on gives the best texture and flavor—look for good marbling at Costco or your local butcher. Ask for the butt (upper shoulder), not the picnic cut. The fat cap on top is your friend—it renders down, bastes the meat, and forms that caramelized crust. A 4-pound roast feeds a crowd with leftovers, but adjust up or down as needed.
No brown sugar? Maple syrup or honey (same amount) works in a pinch. Swap apple cider vinegar for white vinegar or lemon juice if that’s what you’ve got. The dry rub spices can all be adjusted to taste—more paprika for smokiness, extra garlic powder if you love it. Skip the veggies if you want, but they add moisture and flavor to the pan juices. Chicken stock can be swapped for beef or vegetable stock.
Roast leftovers keep beautifully. Shredded pork stays moist for 4 days in the fridge, or freeze for 3 months. Reheat gently with a splash of stock to keep it tender. The veggies? Pick them out and discard, or blend into a quick pan sauce (don’t skip the fat—it’s flavor gold).
Why You’ll Love This Recipe
- Set and Forget: I rub it with salt, pepper, garlic and onion powder, toss it in the oven, and walk away for hours—no babysitting required.
- Crispy Outside, Tender Inside: That mix of spices forms the most incredible crust while the meat falls apart at the touch of a fork.
- Feeds My Whole Crew: One pork shoulder butt roast means dinner for six plus leftovers for sandwiches the next day.
- Budget Friendly: Honestly, it’s the cheapest way I’ve found to feed a crowd without sacrificing flavor.
Step-by-Step Instructions for Pork Shoulder Butt Roast in Oven
Here’s my proven method for achieving incredibly tender, fall-apart pork every time.
Step 1: Season the Pork Shoulder Butt Generously
Pat the 4 lb Pork Shoulder Butt dry with paper towels to ensure the seasoning adheres properly. In a small bowl, combine the 2 tbsp Kosher Salt, 1 tbsp Black Pepper, 2 tbsp Garlic Powder, 1 tbsp Onion Powder, and 1 tbsp Smoked Paprika.
Rub this spice mixture evenly over all surfaces of the pork, pressing it into the meat. Then, rub the 0.5 cup Brown Sugar over the top, creating a sweet and savory crust. This step ensures a flavorful bark forms during cooking.
Step 2: Sear and Prepare the Vegetables
Heat the 2 tbsp Olive Oil in a large Dutch oven over medium-high heat. Once hot, sear the pork on all sides until deeply browned, about 3-4 minutes per side. Remove the pork and set it aside.
In the same pot, add the 1 whole Yellow Onion (quartered), 3 whole Carrots (chopped), and 3 pieces Celery Stalks (chopped). Cook for 3-4 minutes until the vegetables begin to soften and brown slightly.
Step 3: Deglaze and Slow Roast
Pour the 0.25 cup Apple Cider Vinegar into the pot, scraping up any browned bits from the bottom. This adds a tangy depth to the cooking liquid. Add the 1 cup Chicken Stock and 2 pieces Bay Leaves, then return the pork to the pot, placing it on top of the vegetables.
Cover the pot and transfer it to a preheated 325°F oven. Roast for 3.5 to 4 hours, or until the pork is fork-tender and easily pulls apart. Check the pork occasionally and add a splash of water or stock if the liquid level gets too low.
Step 4: Rest and Shred
Once the pork is tender, carefully remove it from the pot and place it on a cutting board. Let it rest for 15-20 minutes to allow the juices to redistribute. This ensures the meat stays moist when shredded.
Using two forks, shred the pork into large chunks, discarding any large pieces of fat or bone. Skim any excess fat from the cooking liquid and discard the bay leaves. Serve the pork with the roasted vegetables and some of the flavorful cooking liquid spooned over the top.
Pro Tips For Making Pork Shoulder Butt Roast Recipe In Oven
- Start Hot, Finish Low: Sear the pork shoulder at 450°F for 20 minutes to lock in flavor, then drop to 325°F for the remaining cook time—I learned this the hard way after my first few roasts came out dry.
- Season Overnight: Rub the shoulder with salt, pepper, garlic powder, and onion powder the night before; the spices penetrate deeper and the meat absorbs the flavor better than same-day seasoning.
- Skip the Water Pan: Resist the urge to add water to the roasting pan—it steams the pork instead of letting it develop that crisp, caramelized crust you’re after.
- Rest 30 Minutes: Let the roast sit under loose foil for at least 30 minutes after pulling it from the oven; I used to slice right in and watched all the juices run out onto the cutting board.
Serving Suggestions for This Dish
Plating Presentation
I love serving this pork on a large wooden board for a rustic feel. Arrange the shredded meat in the center, surrounded by the roasted onions, carrots, and celery. The natural juices create a beautiful pool around the meat. 💛
Sauce Options
For extra moisture, I drizzle some of the cooking liquid over the pork. You can also serve with BBQ sauce on the side—I recommend Sweet Baby Ray’s for its balance of sweet and tangy. A sprinkle of fresh parsley adds a pop of color.
Bread Pairings
Soft brioche buns make incredible pulled pork sandwiches. Toast them lightly and spread with a little Dijon mustard for extra flavor. For a lighter option, corn tortillas work perfectly for tacos.
Side Dish Ideas
Coleslaw provides a refreshing crunch that cuts through the richness. I also love serving with roasted potatoes or a simple green salad dressed with lemon vinaigrette.
Garnish Touch
Pickled red onions or jalapeños add a bright, tangy contrast. For heat lovers, serve with hot sauce or sliced serrano peppers. A dusting of smoked paprika on top enhances the dish’s visual appeal.
Nutrition Facts
Frequently Asked Questions
What internal temperature should it reach?
Cook until it hits 195-205°F internally. At this range, collagen breaks down completely, making the meat fork-tender. Use a meat thermometer for accuracy.
Can I cook it faster at higher heat?
Not recommended. Low and slow (325°F for 3.5-4 hours) ensures tenderness. Higher temps can dry it out before connective tissues break down.
How do I store leftovers?
Shredded pork keeps in an airtight container for 4 days in the fridge or 3 months frozen. Reheat gently with broth to maintain moisture.
Should I remove the fat cap before cooking?
No! The fat cap renders down, basting the meat and creating a flavorful crust. Just trim any excessively thick areas before seasoning.

- Potato Patty Recipe No Egg: Crispy Edges Without the Binder - October 30, 2026
- Paula Deen’s Potato Chip Cookies Recipe: Salty-Sweet Crunch in Every Bite - October 30, 2026
- Potato Gnocchi Recipe Ideas: Pillowy Soft Dumplings With Rustic Charm - October 30, 2026