
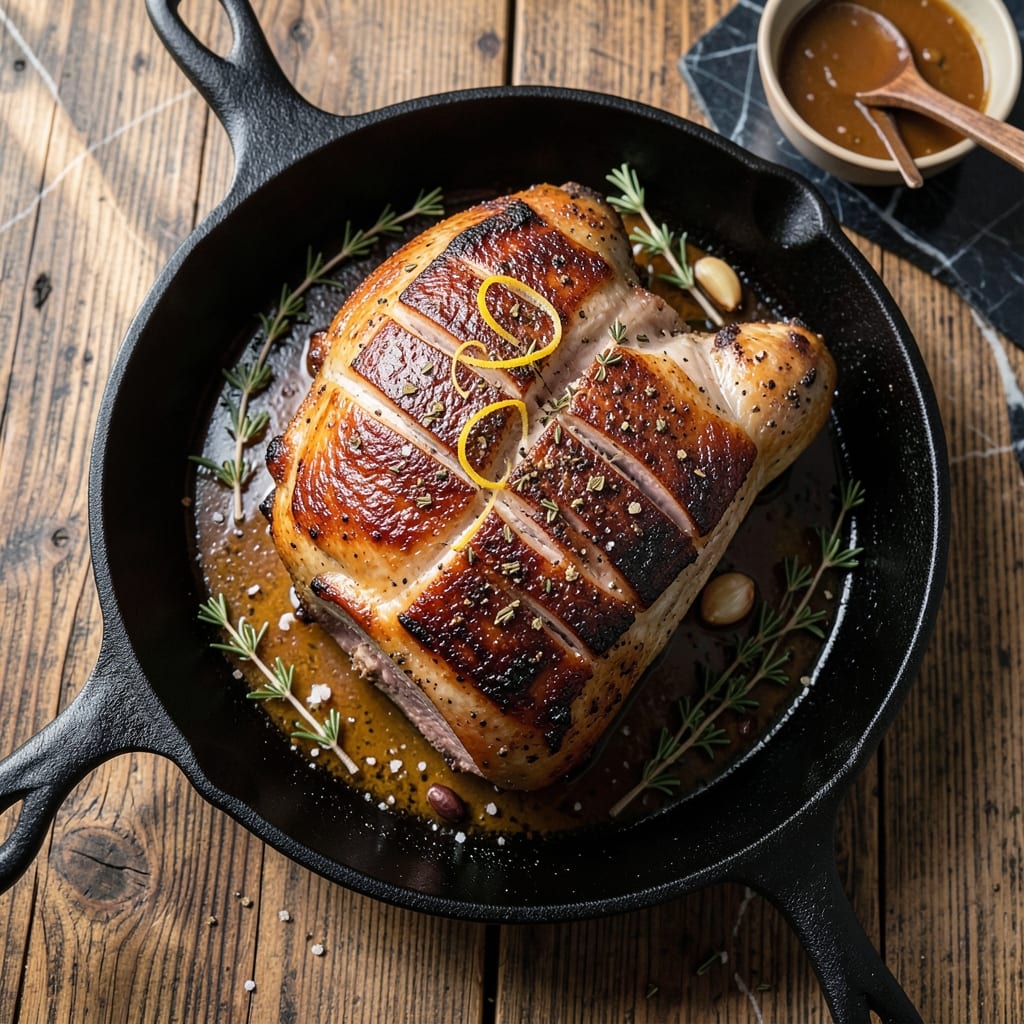
Achieving succulent pork shoulder in under 3 hours is possible with the right oven technique. I developed this method after years of experimenting with different cooking times and temperatures.
The key is using high heat initially to develop a flavorful crust, then reducing the temperature to ensure the meat stays moist and tender. This approach cuts the traditional cooking time significantly without sacrificing quality.
You’ll end up with pork that pulls apart easily, with a caramelized exterior and juicy interior. The quick method doesn’t require special equipment—just your oven and a reliable meat thermometer.
Perfect for weeknight dinners when you want restaurant-quality results in a fraction of the time. The process is straightforward and delivers consistent results every time.
Ingredients for Pork Shoulder Roast Recipe Oven Quick
Succulent pork shoulder requires bold seasonings and a few pantry staples for depth.
| Ingredient | Amount | Notes |
|---|---|---|
| Pork Shoulder 🍖 | 3 lb | Boneless, skin-on preferred for crust |
| Kosher Salt 🧂 | 1 ½ tbsp | Diamond Crystal preferred for even seasoning |
| Freshly Ground Black Pepper 🌶️ | 1 tbsp | Coarse grind for texture |
| Garlic Cloves 🧄 | 6 cloves | Smashed to release oils |
| Dried Oregano 🍃 | 1 tbsp | Mediterranean variety preferred |
| Dried Thyme 🌿 | 1 tbsp | Rubbed between fingers to activate |
| Smoked Paprika 🌶️ | 1 tsp | For depth and color |
| Olive Oil 🫒 | 2 tbsp | Extra-virgin for richness |
| Apple Cider Vinegar 🍏 | 2 tbsp | Balances richness of pork |
| Brown Sugar 🍚 | 2 tbsp | Light or dark, for caramelization |
| Low-Sodium Chicken Stock 🍲 | 1 cup | For braising liquid |
| Yellow Onion 🧅 | 1 whole | Large, quartered for aroma |
| Carrots 🥕 | 2 whole | Peeled and cut into chunks |
| Fresh Rosemary 🌿 | 2 sprigs | For aromatic braising |
The pork shoulder is the foundation—bone-in or boneless both work, but boneless cooks more evenly. Look for good marbling (those white fat streaks) which ensures juiciness. Costco sells excellent pre-packaged shoulders, or ask your butcher for a 3-4 lb piece cut from the larger roast. The skin-on version develops a superior crust under high heat.
No apple cider vinegar? White vinegar or lemon juice can substitute, though the flavor profile will shift slightly. Dried rosemary at one-third the amount works if fresh isn’t available. For the stock, vegetable broth is a fine alternative. The brown sugar can be swapped with maple syrup or honey—just reduce liquid slightly to compensate.
Store raw pork in the coldest part of your fridge for up to 3-4 days. The cooked roast keeps well for 4-5 days refrigerated, or freeze portions for up to 3 months. Always bring meat to room temperature before cooking for even doneness.
Why You’ll Love This Recipe
- One Pan Magic: I just season, sear, and let the oven do the work—no complicated steps or extra dishes.
- Garlic-Herb Crust: That mix of crushed garlic, oregano, and black pepper forms the most addictive crispy crust on the pork.
- Feeds the Crew: I make this for Sunday dinner and we’re eating leftovers in tacos, sandwiches, and fried rice all week.
- Budget Hero: Honestly, pork shoulder is cheap, and this turns it into something that tastes like a fancy roast.
Step-by-Step Instructions for Pork Shoulder Roast
This method delivers tender, flavorful results efficiently without sacrificing quality.
Step 1: Season and Sear the Pork Shoulder
Pat the 3 lb Pork Shoulder dry with paper towels to ensure proper browning. In a small bowl, combine the 1.5 tbsp Kosher Salt, 1 tbsp Freshly Ground Black Pepper, 1 tbsp Dried Oregano, 1 tbsp Dried Thyme, and 1 tsp Smoked Paprika. Rub this mixture evenly over all surfaces of the pork, pressing to adhere.
Heat the 2 tbsp Olive Oil in a large Dutch oven over medium-high heat. Sear the pork on all sides for 8-10 minutes total until deeply browned. This creates a flavorful crust that locks in juices during the braise.
Step 2: Build the Braising Liquid
Remove the pork and reduce heat to medium. Add the quartered 1 whole Yellow Onion, 2 whole Carrots (peeled and chunked), and 6 cloves Garlic Cloves (smashed) to the pot. Sauté for 3-4 minutes until the vegetables begin to soften and brown.
Pour in the 2 tbsp Apple Cider Vinegar to deglaze, scraping up browned bits. Add the 2 tbsp Brown Sugar, stirring until dissolved. Pour in the 1 cup Low-Sodium Chicken Stock and add the 2 sprigs Fresh Rosemary. The liquid should just cover the bottom of the pot.
Step 3: Braise to Tenderness
Return the pork to the pot, spooning some liquid over the top. Cover tightly and transfer to a preheated 325°F oven. Braise for 2 to 2.5 hours, turning the pork halfway through. The meat is done when it shreds easily with a fork and reaches an internal temperature of 195-200°F.
Check occasionally to ensure the liquid hasn’t evaporated—add a splash of stock if needed. The vegetables should be tender and the liquid slightly reduced, creating a rich, aromatic base for the pork.
Step 4: Rest and Serve
Carefully transfer the pork to a cutting board, leaving the vegetables and liquid in the pot. Tent loosely with foil and let rest for 15 minutes. This allows the juices to redistribute, ensuring moist, flavorful meat.
Shred the pork using two forks, discarding any large fat pieces. Skim excess fat from the braising liquid and serve the pork with the vegetables and sauce spooned over the top. The result is succulent, fall-apart tender pork with a rich, savory sauce.
Pro Tips For Making Pork Shoulder Roast Recipe Oven Quick
- Sear First: I learned this the hard way—starting the pork shoulder in a screaming hot pan for 3-4 minutes per side gives it that deep brown crust you just can’t get from the oven alone.
- Score the Fat: Cut 1/4-inch crosses into the fat cap before seasoning so the salt, pepper, and oregano actually penetrate, and the fat renders out faster in the oven.
- Skip the Overcrowding: Resist the urge to cram garlic cloves all over the meat—just 3-4 deep slits with a clove in each is plenty, otherwise they burn before the pork cooks.
- Rest Under Foil: Pull it at 195°F, tent it loosely with foil, and give it a solid 15-20 minutes—this is when the juices redistribute, so don’t rush it.
Dietary Considerations for This Recipe
Gluten-Free Friendly
This dish is naturally gluten-free—all ingredients, from the pork shoulder to the braising liquid, contain no wheat, barley, or rye. For extra safety, I verify that my chicken stock is certified gluten-free, as some brands add thickeners. 💪
Dairy-Free by Design
With no butter, cream, or cheese in the recipe, it’s completely dairy-free. The richness comes from the pork itself and the caramelized braising liquid. I’ve served this to lactose-intolerant friends without any issues.
Low-Carb Adaptation
To reduce carbs, simply omit the 2 tbsp Brown Sugar and replace it with 1 tbsp erythritol sweetener or a sugar-free alternative. The carrots and onion contribute minimal carbs, but you can halve their amount if needed.
Keto-Friendly Tweaks
For strict keto, skip the brown sugar entirely and add an extra 1 tsp Smoked Paprika for depth. The apple cider vinegar and herbs keep the flavor bold without adding carbs.
Allergen Awareness
This recipe contains no top allergens, but always check labels on chicken stock and spices for hidden additives. I source my spices from New Seasons Market to avoid cross-contamination concerns.
Sodium Control
To lower sodium, use low-sodium chicken stock and reduce the Kosher Salt to 1 tsp. The apple cider vinegar and herbs still deliver plenty of flavor without excess salt. 💡
Nutrition Facts
Frequently Asked Questions
Can I use a bone-in cut instead?
Yes, but expect it to take 30-45 minutes longer to reach 195-200°F. Bone-in adds flavor but slows heat penetration. For the quickest results, stick with boneless.
What if my pork isn’t shredding after 2 hours?
Check the internal temperature—it needs to reach at least 195°F. If it’s stuck at 180°F, return it to the oven for 30-45 minutes more. Collagen breaks down slowly.
Can I make this in a slow cooker?
For a quick method, no. Slow cookers take 6-8 hours on low. But if time isn’t an issue, sear first, then cook on low with the same braising liquid for tender results.
Is resting really necessary?
Skipping the 15-minute rest means juices will spill out when you cut, leaving the meat dry. The fibers reabsorb moisture during this time.

- Potato Patty Recipe No Egg: Crispy Edges Without the Binder - October 30, 2026
- Paula Deen’s Potato Chip Cookies Recipe: Salty-Sweet Crunch in Every Bite - October 30, 2026
- Potato Gnocchi Recipe Ideas: Pillowy Soft Dumplings With Rustic Charm - October 30, 2026