
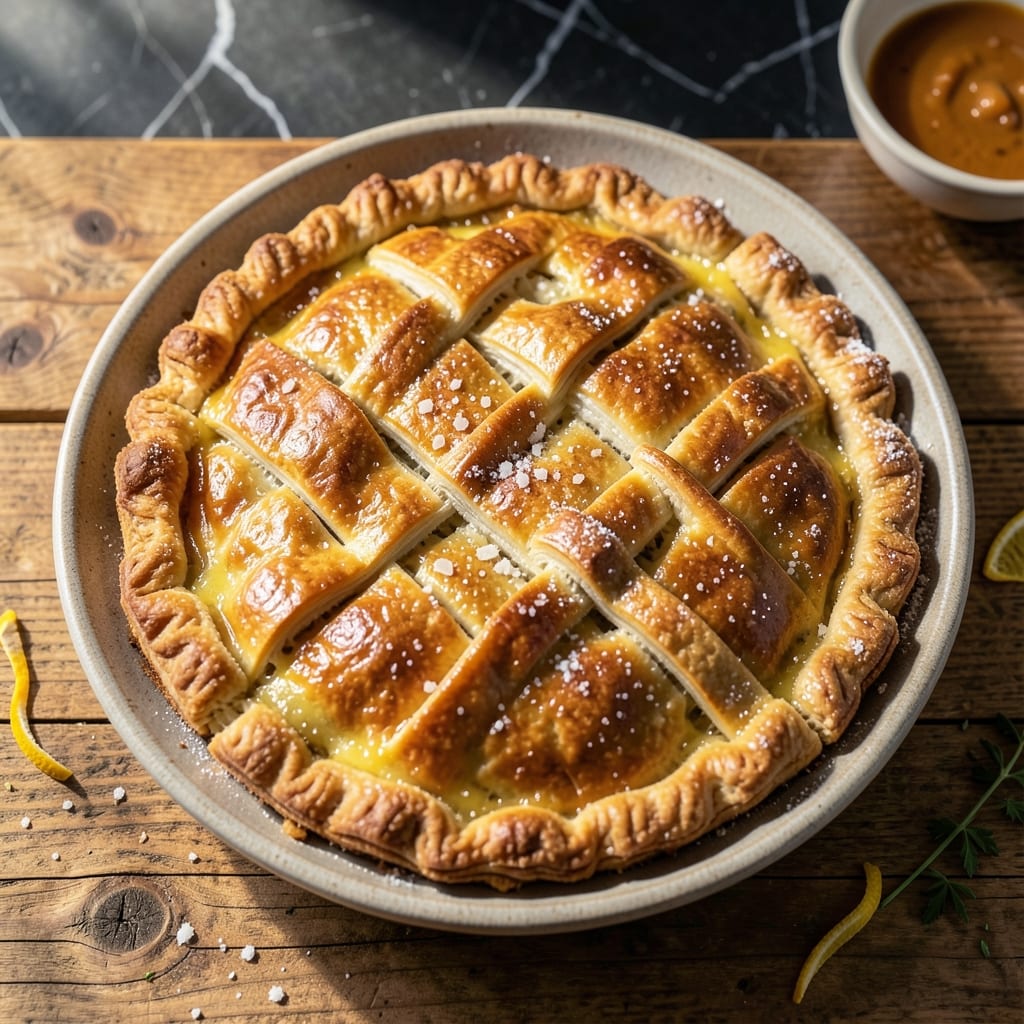
That tearful pot pie disaster in my Boston apartment taught me one thing: great crust doesn’t need shortening. This all-butter version delivers flaky, golden layers that shatter with every bite, proving that simplicity often wins.
Cold butter and minimal handling are the secrets to creating those coveted layers. The technique relies on keeping the butter intact until it hits the oven heat, where it creates steam pockets between the dough’s folds.
What emerges is a crust that’s tender yet sturdy enough to hold hearty fillings. It browns beautifully and develops a rich, buttery flavor that enhances any pot pie.
Perfect for both top and bottom crusts, this method works in standard pie dishes or individual ramekins. The results speak for themselves.
Ingredients for Pot Pie Crust Recipe No Shortening
A simple list of pantry basics creates that golden, flaky crust you remember from childhood.
| Ingredient | Amount | Notes |
|---|---|---|
| All-Purpose Flour 🌾 | 2 ½ cups | Plus extra for dusting |
| Unsalted Butter 🧈 | 1 cup | Very cold, cubed |
| Ice Water 💧 | ½ cup | Plus 1 tbsp as needed |
| Salt 🧂 | 1 tsp | Fine sea salt preferred |
| Granulated Sugar 🍚 | 1 tsp | Optional, for balance |
| Large Egg 🥚 | 1 whole | For egg wash finish |
| Heavy Cream 🥛 | 1 tbsp | For egg wash richness |
The butter is everything here. Use high-quality unsalted—Plugrá or Kerrygold have the fat content you need for those perfect layers. Keep it ice cold until the moment you cut it in (I freeze mine for 15 minutes before starting). The flour should be all-purpose, nothing fancy. If your kitchen runs warm, chill the flour too. King Arthur is my go-to brand for consistency.
No egg for the wash? Milk or cream alone still gives you that golden brown finish. Out of all-purpose? Bread flour at a 1:1 swap actually makes it slightly crispier. The sugar is optional but balances the salt—skip it if you prefer savory-only. For a vegan version, use coconut oil instead of butter (chill it solid first) and plant milk for the wash.
The dough keeps wrapped in plastic for 2 days in the fridge, or freeze for 3 months. Let it sit at room temperature for 10 minutes before rolling if chilled. Discard any egg wash leftovers—don’t reuse. Baked crusts stay crisp for 24 hours at room temperature if kept dry.
Why You’ll Love This Recipe
- No-Hassle Dough: I just mix, roll, and go—no special tools, no shortening, just butter and flour working their magic.
- Buttery Perfection: That flaky, golden crust from cold butter and a pinch of sugar? It’s the kind of taste that makes people sigh.
- Weeknight Hero: Between us, I’ve used this for chicken pot pie, apple hand pies, even a quick quiche crust.
- Pantry Staples: Honestly, I always have flour, butter, and salt on hand, so this costs me nothing extra and saves last-minute grocery runs.
Step-by-Step Instructions for Butter-Only Pot Pie Crust
Here’s the method that guarantees flaky, golden layers using only butter for maximum flavor.
Step 1: Combine Dry Ingredients and Cold Butter
In a large bowl, whisk together the 2.5 cups All-Purpose Flour, 1 tsp Salt, and 1 tsp Granulated Sugar until evenly distributed. The sugar adds subtle sweetness that balances the richness of the butter, but you can omit it if you prefer a purely savory crust.
Add the 1 cup Unsalted Butter, which must be very cold and cubed into ½-inch pieces. Use a pastry cutter or your fingers to work the butter into the flour until the mixture resembles coarse crumbs with pea-sized butter pieces visible. This creates the flaky layers we’re after.
Step 2: Add Ice Water Gradually
Create a well in the center of the flour-butter mixture and pour in ½ cup Ice Water. Use a fork to gently mix, starting from the center and working outward. The dough will begin to come together but will still look shaggy—that’s exactly what you want at this stage.
If the dough seems too dry and isn’t holding together when pressed, add the additional 1 tbsp of ice water. Be careful not to overmix; stop as soon as the dough clumps together. Overworking develops gluten, which makes the crust tough instead of tender and flaky.
Step 3: Chill the Dough Thoroughly
Turn the dough onto a lightly floured surface and divide it into two equal portions. Shape each into a disk about 1-inch thick, wrap tightly in plastic wrap, and refrigerate for at least 1 hour (or up to 2 days). Chilling relaxes the gluten and keeps the butter cold, which is essential for flakiness.
This resting period also makes the dough easier to roll out. If you’re in a hurry, you can freeze the dough for 20-30 minutes, but don’t skip chilling entirely. The butter must stay solid until it hits the oven, where it will create steam and lift the layers.
Step 4: Roll and Fit the Crust
On a lightly floured surface, roll one disk of dough into a 12-inch circle about ⅛-inch thick. To prevent sticking, dust both the surface and the rolling pin with flour as needed. Roll from the center outward, turning the dough occasionally to maintain an even thickness.
Transfer the rolled dough to a 9-inch pie dish or pot pie pan. Gently press it into the bottom and up the sides without stretching. Trim the edges, leaving a ½-inch overhang. Brush the crust with an egg wash made from the 1 whole Large Egg and 1 tbsp Heavy Cream for a golden finish.
Step 5: Add Filling and Top Crust
Fill the crust with your pot pie filling, then roll out the second dough disk to the same size. Place it over the filling, trim the edges, and crimp to seal. Cut several 1-inch slits in the top crust to allow steam to escape during baking.
Brush the top crust with the remaining egg wash. Bake according to your pot pie recipe instructions, typically at 375°F for 30-40 minutes, until the crust is deep golden brown and the filling is bubbling. The butter will create beautiful, flaky layers that shatter with every bite.
Pro Tips For Making Pot Pie Crust Recipe No Shortening
- Chill the Butter: Cut your unsalted butter into small cubes and freeze for 15 minutes before mixing—this keeps it from melting into the flour, which is what creates those flaky layers.
- Use Ice-Cold Water: Measure your water, then add ice cubes to it while you prep the rest, and remove the ice just before mixing; warm water will toughen the crust.
- Don’t Overwork It: Mix just until the dough comes together—after burning three batches, I finally figured out that overworking develops gluten, making the crust tough instead of tender.
- Rest Before Rolling: Let the dough rest in the fridge for at least 30 minutes before rolling; I learned this the hard way—skipping it leads to shrinking and cracking when baked.
Regional Styles of This pot pie crust recipe no shortening
New England Tradition
In my Boston kitchen, this buttery crust is how we’ve always topped chicken pot pie. The cold New England winters make it perfect for hearty meals that stick to your ribs. I remember Nonna saying the flakier the crust, the more love in the meal. 💛
Southern Comfort Style
Down South, they often add a touch of cayenne pepper (¼ tsp) to the flour mix for a subtle kick. This pairs beautifully with classic chicken and veggie fillings, adding warmth to each bite. The spice enhances the butter’s richness without overpowering it.
Midwest Hearty Approach
In the Midwest, they prefer a slightly thicker crust for their pot pies. Roll the dough to ⅙-inch thickness instead of ⅛-inch for extra sturdiness. This holds up well to extra-hearty fillings like beef and root vegetables, making it a meal in itself.
I tested this in my tiny apartment kitchen—it’s forgiving even in less-than-ideal spaces.
French-Inspired Twist
For a French touch, brush the crust with egg wash and sprinkle coarse sea salt on top before baking. This adds a delicate crunch and elevates the flavor profile. It’s a small detail that makes the crust feel gourmet. ✨
Pacific Northwest
Out West, they often use whole wheat flour for half the all-purpose to add nuttiness. Replace 1.25 cups of all-purpose with whole wheat for a heartier texture. The butter still creates flaky layers, but with a deeper, earthier taste.
Nutrition Facts
Frequently Asked Questions
Can I use frozen butter for this crust?
Yes, but grate it directly into the flour while still frozen. This creates perfect pea-sized pieces without warming the butter. Keep everything cold until baking for the flakiest results.
Why did my crust turn out tough?
Overworking the dough develops gluten, making it dense. Use gentle pressure when mixing and stop as soon as it comes together. Chilling between steps also prevents toughness.
How do I prevent a soggy bottom crust?
Pre-bake the bottom crust for 10 minutes at 375°F before adding filling. Also, ensure your filling isn’t too watery. This creates a moisture barrier.
Can I make this crust ahead of time?
The dough keeps wrapped in plastic for 2 days refrigerated or 3 months frozen. Let it sit at room temperature for 10 minutes before rolling if chilled.

- Potato Patty Recipe No Egg: Crispy Edges Without the Binder - October 30, 2026
- Paula Deen’s Potato Chip Cookies Recipe: Salty-Sweet Crunch in Every Bite - October 30, 2026
- Potato Gnocchi Recipe Ideas: Pillowy Soft Dumplings With Rustic Charm - October 30, 2026