
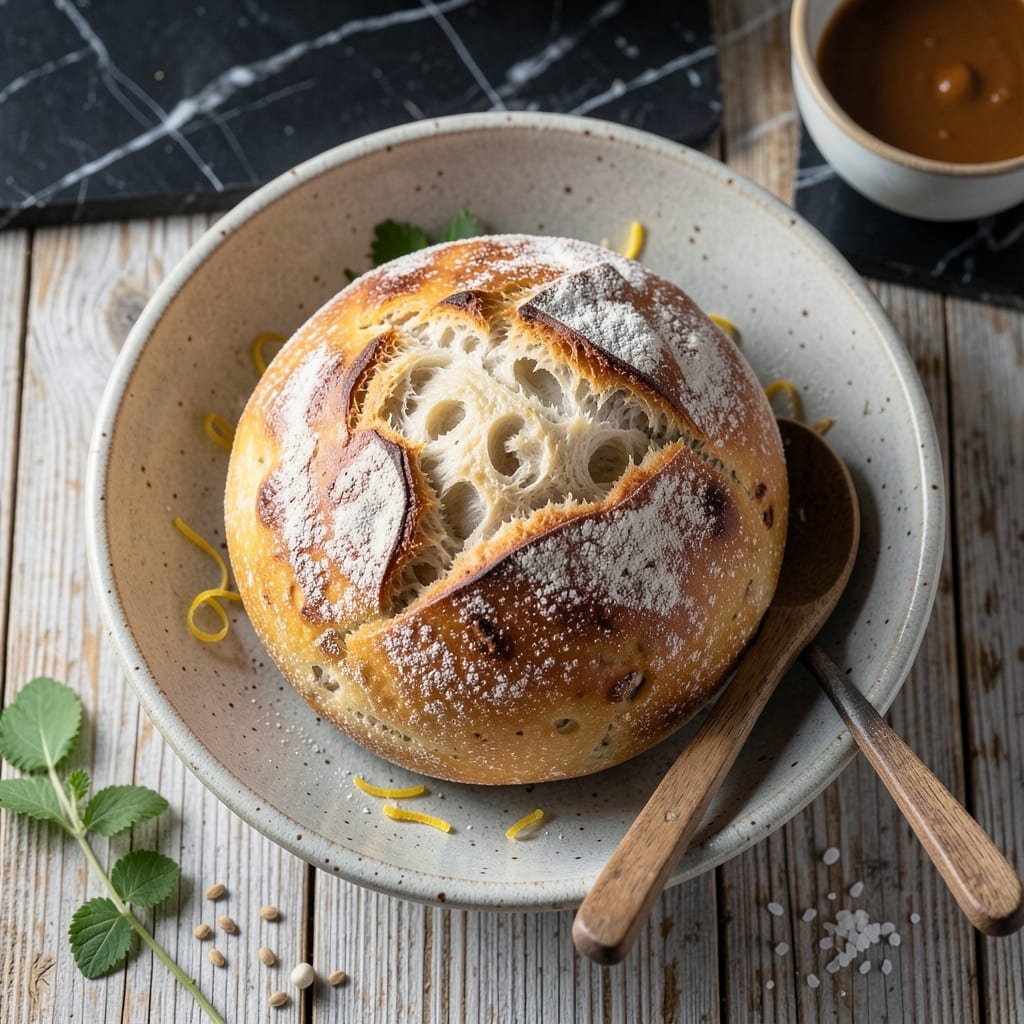
This no-knead rustic loaf proves that great bread doesn’t require complicated techniques or specialty ingredients. With just 4 simple components and minimal effort, you’ll achieve a crusty exterior and soft, airy crumb that rivals artisan bakery bread.
The beauty of this method lies in its simplicity—mix, rest, and bake. No kneading, no fancy equipment, just time and patience working together to develop flavor and texture. The long fermentation is what transforms basic ingredients into something extraordinary.
What emerges from your oven is a golden, crackling loaf with an open crumb structure that’s perfect for sandwiches or serving alongside soups. The flavor is clean and slightly tangy, with a chewiness that makes every bite satisfying.
Ideal for beginners or anyone seeking a foolproof way to make bread at home. This approach delivers consistent results every time.
Ingredients for Water Bread Recipe Easy
Four ingredients transform into a rustic loaf with artisan quality and minimal effort.
| Ingredient | Amount | Notes |
|---|---|---|
| Bread Flour 🌾 | 3 ¼ cups | All-purpose works in a pinch |
| Water 💧 | 1 ½ cups | Warm, about 110°F |
| Active Dry Yeast 🍞 | ¾ tsp | Or 1 packet |
| Salt 🧂 | 2 tsp | Diamond Crystal kosher preferred |
The flour is the foundation here. King Arthur Bread Flour yields the best crumb structure and rise, but Gold Medal All-Purpose works acceptably for beginners. Yeast freshness is critical—check the expiration date. Red Star or Fleischmann’s are reliable brands. Use filtered water if your tap has strong odors or flavors that could affect fermentation.
No bread flour? All-purpose with 1 tbsp vital wheat gluten per cup mimics the protein content. Out of yeast? This won’t work without it—don’t attempt substitutions. The salt is essential for flavor and fermentation control; do not omit. For a tangier loaf, extend the first rise by 2-4 hours (up to 18 total).
Store flour in an airtight container in a cool, dark place for up to 6 months. Yeast keeps in the freezer for 1 year unopened. The baked loaf stays fresh for 2-3 days at room temperature in a paper bag, or freeze for 1 month.
Why You’ll Love This Recipe
- No-Fuss Mixing: I just stir bread flour, water, yeast, and salt—no kneading, no fancy tools.
- Crispy Yet Airy: The crust crackles, but inside it’s light and chewy, all from those four simple ingredients.
- Weeknight Hero: I pull this together for soups, sandwiches, or even as a snack—no planning needed.
- Pennies Per Loaf: Bread flour and water keep my grocery bill low, and one batch makes enough for days.
Step-by-Step Instructions for Water Bread
Here’s the method. Straightforward, tested, works every time.
Step 1: Activate the Yeast
In a large mixing bowl, combine the 1.5 cups Water with the 0.75 tsp Active Dry Yeast. The water should be warm, around 110°F—test it with your finger; it should feel comfortably warm but not hot. This is the ideal temperature for activating the yeast without killing it.
Let the mixture sit for 5-10 minutes until the yeast begins to foam and bubble. This visual confirmation means the yeast is alive and ready to work. If you don’t see any activity, your yeast may be expired, and you’ll need to start over with fresh yeast.
Step 2: Mix the Dough
Add the 3.25 cups Bread Flour and 2 tsp Salt to the yeast mixture. Use a wooden spoon or dough whisk to combine everything into a shaggy, sticky dough. Don’t worry about lumps or uneven spots—they’ll resolve during the rise. The dough will be too sticky to knead by hand, which is exactly what you want.
Ensure all the flour is hydrated by scraping the sides of the bowl and mixing thoroughly. The dough should pull away from the sides but still cling to the bottom. This no-knead method relies on time to develop the gluten, so resist the urge to overmix.
Step 3: First Rise
Cover the bowl with a damp kitchen towel or plastic wrap and let the dough rise at room temperature for 12-18 hours. I typically prepare this in the evening and let it rise overnight. The dough will double in size and develop a bubbly, aerated texture.
This long, slow fermentation is key to building flavor and a good crumb structure. If your kitchen is cooler, the rise may take closer to 18 hours, but don’t rush it. The dough is ready when it’s puffy and dotted with bubbles.
Step 4: Shape and Second Rise
After the first rise, turn the dough out onto a lightly floured surface. Fold the edges toward the center to form a rough ball, then flip it seam-side down. Use your hands to gently shape it into a smooth, round loaf. Don’t punch down the dough—handle it gently to preserve the air bubbles.
Place the shaped dough on a piece of parchment paper and let it rise again for 1-2 hours at room temperature. It should spring back slowly when poked with a finger. This second rise, called proofing, ensures the loaf will have good oven spring.
Step 5: Bake to Golden Perfection
Preheat your oven to 450°F with a Dutch oven inside for at least 30 minutes. This preheating step is crucial for creating a crisp, golden crust. Carefully transfer the dough, still on the parchment, into the hot Dutch oven.
Bake covered for 30 minutes, then remove the lid and bake for another 15-20 minutes until the loaf is deep golden brown and sounds hollow when tapped on the bottom. Let it cool on a wire rack for at least 1 hour before slicing to allow the crumb to set fully.
Pro Tips For Making Water Bread Recipe Easy
- Proof the Yeast: Always activate your yeast in warm water (105-110°F) with a pinch of sugar first—I learned this the hard way after killing three batches with water that was too hot.
- Weigh Your Flour: Skip the measuring cups and use a scale (250g flour per cup) for consistency; bread flour compacts easily and can throw off your ratios.
- Salt Last: Add salt after the yeast starts bubbling, or it’ll slow down activation—sounds weird, but it works.
- Longer Rest: Let the dough rise until doubled, even if it takes 2 hours; I was skeptical until I tried it and got that perfect airy texture.
Dietary Considerations for This Dish
Vegan Friendly
This recipe is naturally vegan with no animal products—just flour, water, yeast, and salt. It’s perfect for plant-based diets without any substitutions. I love that it proves you don’t need eggs or dairy for amazing bread.
Gluten-Free Option
For a gluten-free version, replace the bread flour with a 1:1 gluten-free baking blend. I recommend King Arthur Measure for Measure. Add 1 tsp xanthan gum to improve structure and rise.
Low-Sodium Adjustment
To reduce sodium, cut the salt to ½ tsp or omit it entirely. The bread will still rise, but the flavor will be milder. I sometimes use 1 tsp for a balanced taste with less sodium. 💪
Allergen Note
This contains wheat gluten from the flour, so it’s not suitable for celiac or wheat allergies. Always check yeast packets for potential cross-contamination if you have severe allergies.
Sugar-Free
Unlike many bread recipes, this one requires no sugar to activate the yeast—the natural starches in flour are sufficient. It’s ideal for those monitoring sugar intake or preferring a less sweet loaf.
Nut-Free
The recipe is nut-free as written, making it safe for nut allergies. Just ensure your flour and yeast are processed in nut-free facilities if allergies are severe. ✨
Nutrition Facts
Frequently Asked Questions
Can I use all-purpose flour instead of bread flour?
Yes! All-purpose flour works fine, though the crumb may be slightly denser. For better results, add 1 tbsp vital wheat gluten per cup to mimic bread flour’s protein content.
Why does the dough need such a long rise time?
The 12-18 hour fermentation develops deep flavor and a better texture. It allows the gluten to relax naturally and the yeast to work slowly, creating those beautiful air pockets.
What if my dough doesn’t rise?
Check your yeast’s expiration date first. If it’s fresh but inactive, your water might have been too hot. Ensure it’s 110°F—test with your finger.
Can I bake this without a Dutch oven?
Yes! Use a baking sheet with a metal bowl inverted over the loaf for the first 30 minutes. This traps steam for a crisp crust.

- Bluefin Tuna Recipe Ideas: Sushi-Grade Seared and Sesame-Crusted - September 28, 2026
- Blue Zone Recipe Ideas: Longevity-Boosting Meals for Vibrant Living - September 28, 2026
- Beefaroni Recipe With Tomato Soup: One-Pot Nostalgic Comfort - September 28, 2026