
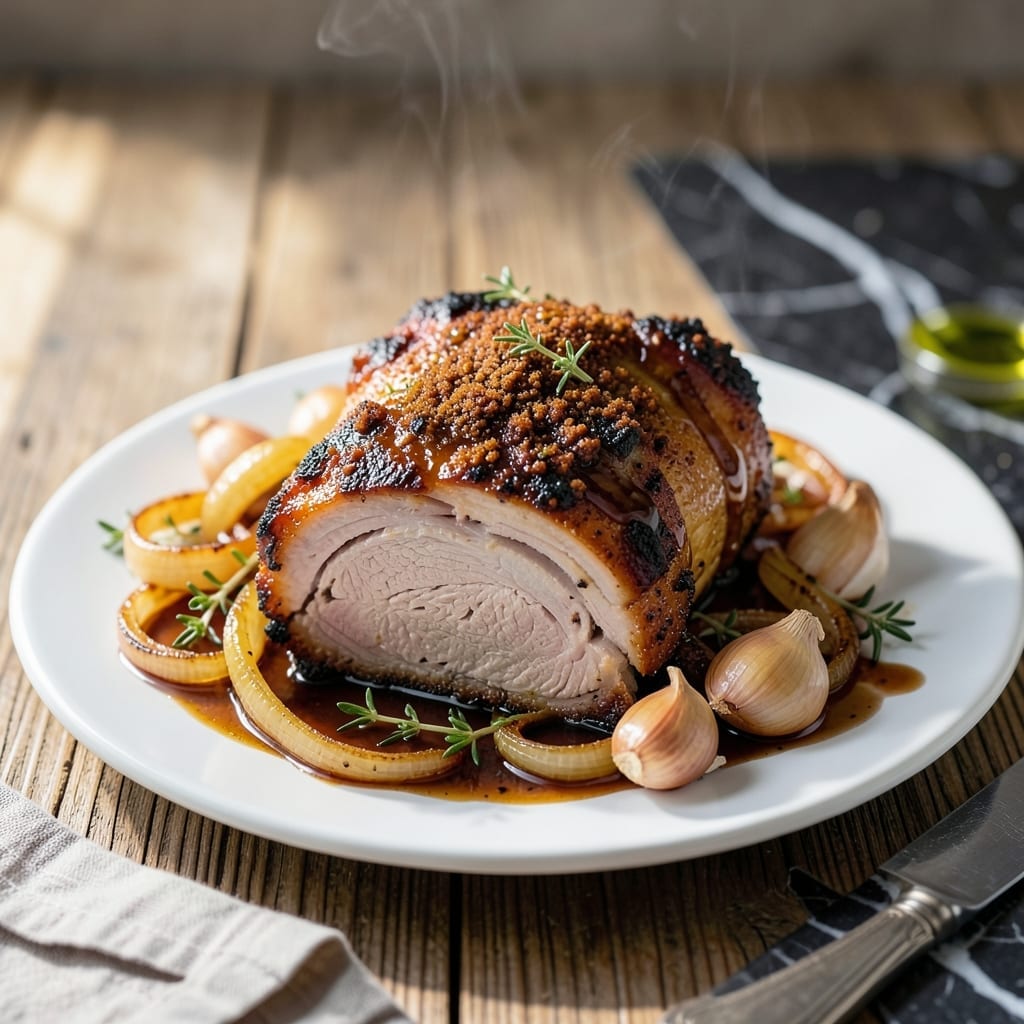
This instant pot method delivers fall-apart pork butt with minimal effort and maximum flavor. The pressure cooker transforms tough cuts into tender, juicy meat in a fraction of the time.
I’ve perfected this technique to ensure consistent results every time. The key is using the right amount of liquid and allowing natural pressure release for optimal texture.
You’ll end up with meat so tender it shreds with a fork, infused with rich, savory flavors. The instant pot locks in moisture while breaking down connective tissue.
Serve this as pulled pork sandwiches, tacos, or alongside your favorite sides. The possibilities are endless with this versatile dish.
Ingredients for Pork Butt Recipe Instant Pot
Pantry staples plus a few fresh items create this unbeatable dish.
| Ingredient | Amount | Notes |
|---|---|---|
| Pork Butt 🐖 | 3 lb | Boneless, trimmed of excess fat |
| Chicken Broth 🍲 | 1 cup | Low-sodium preferred |
| Apple Cider Vinegar 🍎 | ¼ cup | For tangy depth |
| Brown Sugar 🍚 | ¼ cup | Light or dark variety |
| Garlic Cloves 🧄 | 4 cloves | Minced for even distribution |
| Yellow Onion 🧅 | 1 whole | Diced, medium size |
| Smoked Paprika 🌶️ | 2 tsp | For smoky complexity |
| Ground Cumin 🌿 | 1 tsp | Earthy warmth |
| Kosher Salt 🧂 | 1 ½ tsp | Diamond Crystal preferred |
| Black Pepper 🌶️ | 1 tsp | Freshly ground |
| Olive Oil 🫒 | 2 tbsp | For searing pork |
| Dried Oregano 🍃 | 1 tsp | Rubbed between fingers |
| Bay Leaves 🌿 | 2 pieces | For aromatic depth |
| Barbecue Sauce 🍯 | 1 cup | For finishing, optional |
The pork butt is the star here. Look for a well-marbled cut at Costco or your local butcher—fat equals flavor. I always grab the pre-trimmed roasts from Whole Foods if I’m in a hurry (and don’t mind paying extra for convenience). For the chicken broth, Better Than Bouillon paste is my go-to; just mix with hot water. The brown sugar? Light or dark both work, but dark adds a molasses note I love.
No apple cider vinegar? White vinegar with a pinch of sugar gets you close. Swap smoked paprika for regular if that’s what you’ve got, but add a dash of liquid smoke for depth. Fresh out of cumin? Coriander at half the amount works as a substitute. The barbecue sauce is optional—honestly, the pork is flavorful enough to skip it (I do about half the time).
Leftovers keep in the fridge for 4 days, or freeze for 3 months. The flavor actually improves overnight. I portion mine into sandwich-sized bags (worth the extra minute) for easy pulled pork sandwiches later.
Why You’ll Love This Recipe
- Set and Forget: I dump everything in the Instant Pot and walk away—no babysitting, no stirring, just tender pork ready when I am.
- Sweet & Tangy Bite: The brown sugar caramelizes while the apple cider vinegar cuts through, and those whole garlic cloves? Roasty, mellow perfection in every bite.
- Feeds the Freezer: One pork butt makes a week of pulled pork sandwiches, tacos, or fried rice—honestly, it’s my meal prep MVP.
- Budget Hero: Pork butt is cheap, and this recipe turns it into something restaurant-worthy without fancy ingredients.
Step-by-Step Instructions for Pork Butt Instant Pot
This hands-off method delivers fall-apart tender pork with almost no effort from you.
Step 1: Sear the Pork Butt for Depth of Flavor
Set your Instant Pot to the Sauté function and add the 2 tbsp Olive Oil. While it heats, pat the 3 lb Pork Butt dry—this ensures a good sear rather than steaming. Season all sides generously with the 1.5 tsp Kosher Salt, 1 tsp Black Pepper, 2 tsp Smoked Paprika, 1 tsp Ground Cumin, and 1 tsp Dried Oregano.
Sear the pork on all sides until deeply browned, about 3-4 minutes per side. You’ll see a rich crust forming—that’s the Maillard reaction building flavor. Don’t rush this step; a good sear makes a noticeable difference in the final dish.
Step 2: Deglaze and Add Aromatics
Remove the pork and set it aside. Add the diced 1 whole Yellow Onion to the pot and sauté for 2-3 minutes until softened. Stir in the minced 4 cloves Garlic Cloves and cook for 30 seconds until fragrant—just until you smell that warm, toasty aroma.
Pour in the 0.25 cup Apple Cider Vinegar and scrape the bottom of the pot to release all those browned bits. This deglazing step prevents the “Burn” notice and infuses the liquid with deep, caramelized flavor. Add the 2 pieces Bay Leaves and 0.25 cup Brown Sugar, stirring until the sugar begins to dissolve.
Step 3: Pressure Cook Until Tender
Return the pork to the Instant Pot and pour in the 1 cup Chicken Broth. Secure the lid, set the valve to Sealing, and cook on High Pressure for 60 minutes. The pork will transform from tough to fork-tender during this time.
Let the pressure release naturally for 15 minutes, then quick-release any remaining pressure. Open the lid carefully—you’ll be greeted with the rich, smoky aroma of perfectly cooked pork.
Step 4: Shred and Finish with Barbecue Sauce
Remove the pork from the pot and place it on a cutting board. Using two forks, shred the meat—it should come apart with almost no resistance. Discard the 2 pieces Bay Leaves from the pot.
If using, stir the 1 cup Barbecue Sauce into the cooking liquid in the Instant Pot, then return the shredded pork and toss to coat evenly. Let it sit for 5-10 minutes to absorb all the flavors. The result? Juicy, tender pork that’s ready for sandwiches, tacos, or serving as-is.
Pro Tips For Making Pork Butt Recipe Instant Pot
- Sear First Always: I learned this the hard way—skipping the sear leaves your pork butt bland. A quick 3-4 minutes per side on sauté mode locks in flavor before pressure cooking.
- Cut into Chunks: After burning my first attempt with a whole shoulder, I now cut the pork into 3-4 inch pieces. It cooks more evenly and fits better in the Instant Pot.
- Use Natural Release: Resist the urge to quick-release—the pork needs that full 15-minute natural release to stay tender. I rush it sometimes, and the meat turns out tougher every time.
- Double the Garlic: My grandmother swore by this, and she was right: 6-8 cloves instead of 3-4 makes a real difference. The flavor mellows beautifully during the long cook.
Pro Cooking Tips for This Recipe
Perfect Sear Technique
Pat the pork butt completely dry with paper towels before seasoning. This ensures a proper sear instead of steaming. I use paper towels to absorb every bit of moisture for that perfect brown crust. 🔥
Deglaze Thoroughly
After searing, pour the apple cider vinegar and scrape the bottom aggressively with a wooden spoon. Those browned bits are pure flavor that will elevate your final dish significantly.
Liquid Level Matters
Never exceed the ⅔ max fill line in your Instant Pot. For this recipe, the 1 cup chicken broth plus other liquids keeps you well below that. I always double-check before sealing the lid.
Natural Release Key
Resist the urge to quick-release immediately. That 15-minute natural release lets the pork continue cooking gently, ensuring maximum tenderness. I set a timer to remind myself.
Shredding Pro Tip
Use two forks to pull the pork apart—it should come apart effortlessly. For even easier shredding, let it rest in the cooking liquid for 10 minutes after pressure cooking.
Sauce Integration
If using barbecue sauce, mix it with some cooking liquid first. This thins it slightly for better distribution. I prefer Sweet Baby Ray’s for its balanced sweetness and tang. 💡
Nutrition Facts
Frequently Asked Questions
Can I use a smaller or larger cut?
Yes, but adjust cooking time. For 2 lb reduce to 40 minutes, for 4 lb increase to 80 minutes. Always maintain at least 1 cup liquid regardless of size.
What if I don’t have apple cider vinegar?
Substitute with white vinegar plus 1 tsp sugar, or use lemon juice in a pinch. The acidity is key for balancing flavors and tenderizing the meat.
Can I skip the searing step?
Technically yes, but you’ll lose significant flavor. Searing creates a fond that deglazing incorporates into the sauce. If short on time, at least sear one side for 2 minutes.
How do I prevent the burn notice?
Always deglaze thoroughly after searing. Ensure nothing is stuck to the bottom before pressure cooking. Using enough liquid (1 cup minimum) also prevents this common issue.

- Potato Chip Cookie Recipe With Pecans: Buttery Crunch Meets Nutty Richness - October 30, 2026
- Potato Patty Recipe No Egg: Crispy Edges Without the Binder - October 30, 2026
- Paula Deen’s Potato Chip Cookies Recipe: Salty-Sweet Crunch in Every Bite - October 30, 2026