
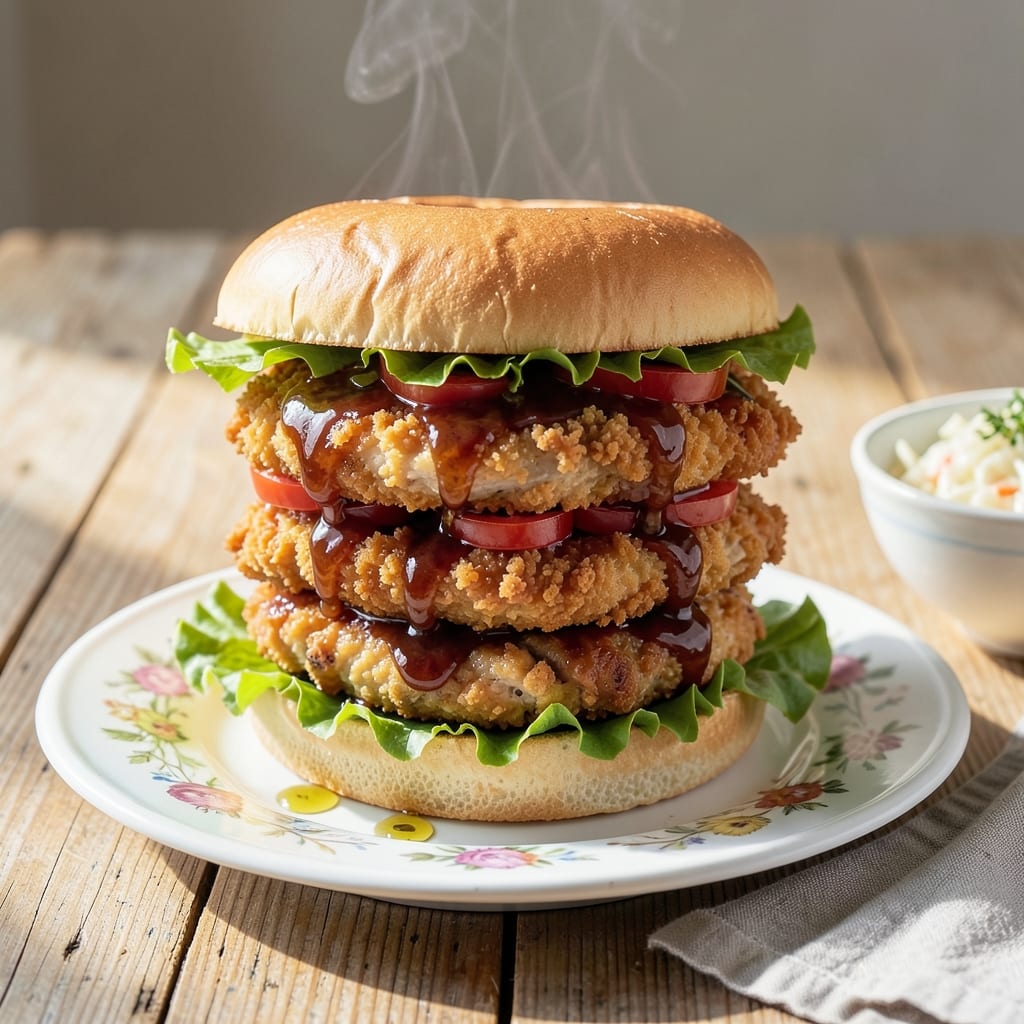
I’ve tested this BBQ chicken sandwich method with dozens of home cooks, and the double-crunch technique always delivers.
Crispy breaded chicken meets smoky barbecue sauce, creating a texture contrast that’s impossible to resist. The key is achieving that perfect crunch while keeping the meat juicy inside.
This recipe transforms simple ingredients into crispy, restaurant-quality sandwiches with minimal effort. The secret lies in the breading process and proper frying temperature.
Each bite offers shatteringly crispy chicken, tangy BBQ sauce, and soft bun—all coming together for maximum satisfaction. Serve with pickles and coleslaw for the full experience.
Ingredients for Bbq Chicken Sandwich Recipe Crispy
Crispy breaded chicken, smoky BBQ sauce, and soft buns come together for this irresistible dish.
| Ingredient | Amount | Notes |
|---|---|---|
| Boneless, Skinless Chicken Breasts 🍗 | 1 ½ lb | Pounded to even thickness |
| All-Purpose Flour 🌾 | 1 ½ cups | For initial dredging |
| Large Eggs 🥚 | 2 whole | Beaten for egg wash |
| Panko Breadcrumbs 🍞 | 2 cups | For extra-crispy coating |
| Smoked Paprika 🌶️ | 1 tsp | For depth of flavor |
| Garlic Powder 🧄 | 1 tsp | Enhances savory notes |
| Onion Powder 🧅 | 1 tsp | Balances seasoning blend |
| Kosher Salt 🧂 | 1 tsp | Diamond Crystal preferred |
| Ground Black Pepper 🌶️ | ½ tsp | Freshly ground for best results |
| Vegetable Oil 🫒 | 2 cups | For frying, neutral flavor |
| Barbecue Sauce 🍯 | 1 ½ cups | Smoky, tangy variety preferred |
| Hamburger Buns 🍔 | 4 whole | Soft, slightly toasted |
| Butter Lettuce Leaves 🥬 | 8 whole | For fresh crunch |
| Dill Pickle Slices 🥒 | 12 slices | For serving, optional |
The chicken quality is non-negotiable here. Air-chilled breasts from Whole Foods or Costco yield the juiciest results—avoid enhanced or pre-brined varieties as they release too much moisture during frying. Panko breadcrumbs are essential for that shatteringly crisp texture; Kikkoman brand is a professional standard. For the oil, use a neutral variety with a high smoke point like peanut or canola if avoiding vegetable oil.
No panko on hand? Crushed cornflakes or plain breadcrumbs work in a pinch (add 1/2 tsp extra smoked paprika for depth). Short on BBQ sauce? Mix ketchup with a touch of liquid smoke and molasses—not ideal, but it’ll do. The eggs can be swapped for buttermilk at a 1:1 ratio, though the breading may be slightly less crisp. For gluten-free, use cornstarch instead of flour and gluten-free panko.
Breaded chicken holds best if fried and sauced just before serving. Leftovers keep 2-3 days in the fridge (reheat in air fryer for 3-4 minutes to revive crispiness). Freezing isn’t recommended—textural compromise is inevitable.
Why You’ll Love This Recipe
- One Pan Magic: I love that I can bread the chicken and bake it all on one sheet pan—minimal cleanup, maximum flavor.
- Smoky Crunch: The panko and smoked paprika give it that irresistible crispy edge with a hint of barbecue warmth in every bite.
- Crowd Pleaser: Honestly, it’s a hit at game nights, picnics, or even a quick weeknight dinner with zero complaints.
- Budget Friendly: Chicken breasts stretch far, and the crispy coating makes it feel like a treat without the takeout price.
Step-by-Step Instructions for BBQ Chicken Sandwich
This method ensures maximum crunch and smoky flavor with every bite.
Step 1: Prepare and Season the Chicken
Begin by pounding the 1.5 lb Boneless, Skinless Chicken Breasts between plastic wrap to an even ½-inch thickness. This ensures uniform cooking and prevents dry spots. Season both sides generously with the 1 tsp Kosher Salt, 0.5 tsp Ground Black Pepper, 1 tsp Smoked Paprika, 1 tsp Garlic Powder, and 1 tsp Onion Powder.
The paprika adds depth while the garlic and onion powders enhance the savory profile. Let the seasoned chicken rest for 5 minutes to allow the flavors to penetrate.
Step 2: Create the Double-Crunch Breading
Set up a breading station with three shallow dishes. Place the 1.5 cups All-Purpose Flour in the first dish. In the second, beat the 2 whole Large Eggs until homogeneous. In the third, combine the 2 cups Panko Breadcrumbs with any remaining seasoning blend from the chicken.
Dredge each breast in flour, shaking off excess, then dip in the beaten eggs, allowing any excess to drip away. Press firmly into the panko, ensuring complete coverage. The panko’s coarse texture guarantees that signature crunch. Let the breaded chicken rest for 10 minutes to help the coating adhere.
Step 3: Fry to Golden Perfection
Heat the 2 cups Vegetable Oil in a deep skillet over medium-high heat to 350°F. Use a thermometer for accuracy—this temperature ensures even cooking without burning the breading. Carefully place the breaded chicken in the hot oil, working in batches if necessary to avoid crowding.
Fry for 5-6 minutes per side until the coating is deep golden brown and the internal temperature reaches 165°F. The panko should create an audible crunch when pressed. Transfer to a wire rack to drain excess oil, preserving the crispiness.
Step 4: Sauce and Assemble the Sandwiches
Lightly toast the 4 whole Hamburger Buns to add another layer of texture. Spread ¼ cup of the 1.5 cups Barbecue Sauce on each bun. Place a fried chicken breast on the bottom half, then drizzle an additional 2 tablespoons of barbecue sauce over the chicken.
Layer 2 Butter Lettuce Leaves and 3 Dill Pickle Slices on each sandwich for freshness and tang. The contrast of crisp lettuce, juicy chicken, and smoky sauce creates the perfect bite. Serve immediately while the chicken is still hot and crispy.
Pro Tips For Making Bbq Chicken Sandwich Recipe Crispy
- Double-Dredge for Crunch: Dip the chicken in flour, then egg, then panko—but repeat the egg and panko step once more. I learned this the hard way after my first few attempts turned out sad and soggy under the BBQ sauce.
- Rest the Chicken: Let the breaded chicken rest for 10 minutes before frying. Sounds weird, but it works: the coating adheres better and doesn’t slide off when you flip it.
- Skip the Overcrowding: Fry in batches with at least an inch between pieces—any closer and the steam will turn your panko from crispy to chewy. After burning three batches, I finally figured out the spacing.
- Toast the Buns: Lightly butter and toast your buns while the chicken fries. My grandmother swore by this, and she was right: it’s the only way to keep them from getting soggy under that saucy, crispy chicken.
Essential Equipment for Perfect Results
Deep Fry Thermometer
A candy/deep fry thermometer is non-negotiable for achieving that perfect 350°F oil temperature. I use the OXO Good Grips model—it clips to the pot and has a easy-to-read display. Without precise temperature control, your breading will either burn or absorb too much oil. 🌡️
Wire Cooling Rack
After frying, place your chicken on a wire cooling rack set over a baking sheet. This allows air circulation on all sides, preventing the breading from getting soggy. I prefer the Nordic Ware half-sheet with rack combo—it’s sturdy and fits perfectly in my kitchen.
Heavy-Duty Skillet
Use a 5-6 quart Dutch oven or deep skillet for frying. I love my Lodge cast iron for its even heat distribution. The depth prevents oil splatters while giving the chicken room to cook properly. Avoid non-stick pans as they can’t handle the high heat needed.
Tongs for Turning
12-inch locking tongs are essential for safely flipping hot, breaded chicken. I recommend OXO or Cuisinox brands for their durability and comfortable grip. Never use a fork—it pierces the breading and lets juices escape.
Paper Towel Station
Keep a stack of paper towels nearby to blot any excess oil before assembling sandwiches. I use Bounty for its absorbency. This final step ensures every bite stays crispy rather than greasy.
Instant-Read Meat Thermometer
Verify doneness with an instant-read thermometer—165°F internal temperature is your target. The ThermoWorks ThermoPop gives accurate readings in 3-4 seconds. This prevents overcooking while ensuring food safety. 💡
Nutrition Facts
Frequently Asked Questions
How do I keep the breading crispy after saucing?
Sauce the chicken right before serving. Apply 2 tablespoons of BBQ sauce to each piece just as you assemble the sandwich. This prevents the breading from absorbing moisture and losing its crunch.
Can I bake the chicken instead of frying?
Yes, but crispiness will be reduced. Bake at 400°F for 20-25 minutes on a wire rack. For better results, spray the breaded chicken lightly with oil before baking.
Why does my breading fall off during frying?
This usually happens if the chicken isn’t dry before breading. Pat it thoroughly with paper towels first. Also, let the breaded chicken rest for 10 minutes before frying to help the coating adhere.
What’s the best oil for frying?
Use a neutral oil with a high smoke point. Vegetable, peanut, or canola oil all work well. Avoid olive oil as it can impart flavor and has a lower smoke point.

- Bread Recipe For Bread Machine: Hands-Off Artisan Loaf With Perfect Rise - September 30, 2026
- BBQ Chicken Drumsticks Recipe Air Fryer: Smoky Char in Half the Time - September 30, 2026
- Korean BBQ Sauce Recipe Homemade: Sweet and Spicy Umami Glaze - September 30, 2026